Appointment Statuses, Symbols and Calendar Legend
Learn about the various visual indicators and symbols on your Zanda calendar.
Many little visual indicators can be seen when looking at your calendar's appointments. This article will go over the various symbols and system statuses that can be seen.
In this article:
Note: Appointment Statuses are system-defined and cannot be created or modified by users. If you need to classify appointments with your own custom labels (e.g., "VIP", "Initial Consult"), please use Appointment Flags instead.
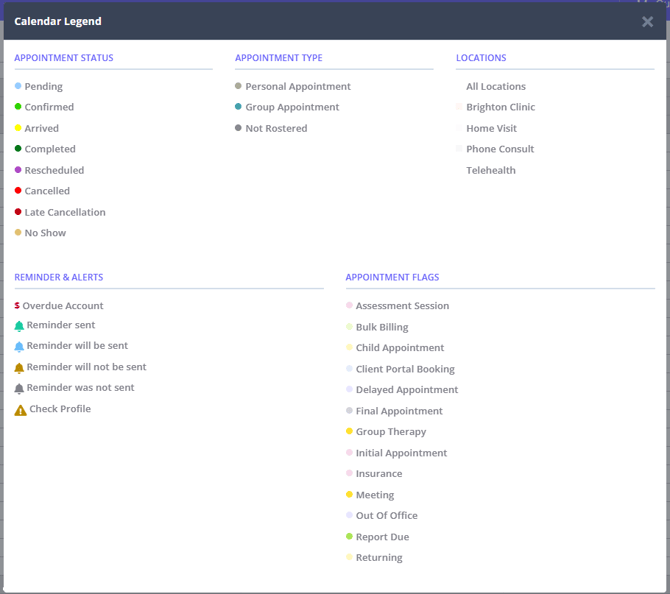
- Pending status color: Light Blue

- Confirmed status color: Lime Green (Manually set, or automatically updated when a client replies 'Yes' to an SMS reminder)

- Arrived status color: Yellow

- Completed status color: Dark Green

- Rescheduled status color: Purple

- Cancelled status color: Red (Manually set, or automatically updated when a client replies 'No' to an SMS reminder if configured)

- Late Cancellation status color: Dark Red

- No Show status color: Yellow Ochre

Rescheduled, Cancelled, Late Cancellation or No Show:
If the appointment has a Service, selecting any of these options will ask whether you'd like to remove their Service and delete the associated invoice.
Appointments with these statuses;
- Are still seen in the calendar to follow up with the client or levy a cancellation charge.
- Will reopen that time slot for another client to book online via your Client Portal.
- Will be tracked on each Client's Statistics page, along with specific Client Reports.
Symbols
You may see a horizontal red line with a small triangle on your calendar view.

- Meaning: This line indicates the current time of day. It moves down the calendar automatically as the day progresses.
- Function: It separates "past" time (above the line) from "future" time (below the line).
- Removal: This is a permanent system feature and cannot be removed or hidden.
- Scheduling: You generally cannot click directly on or above this line to book an appointment if your system prevents booking in the past.
Bell 🔔
- Reminder was not sent - Bell icon color grey

- Reminder will not be sent - Bell icon color yellow

- Reminder will be sent - Bell icon color blue

- Reminder sent - Bell icon color green

Red Currency Sign
- This indicates there is a balance due on the client's account. You can see the balance in the Appointment Details next to the associated invoice or hover over the icon as seen below.

- For more details on the Balance, you will want to go to the Billing > Invoices section of their Profile and look at the invoices.
Blue Circular Arrows
Hint 💡
Learn more about this at Creating, Editing and Deleting Recurring Appointments.
Accessing the Legend
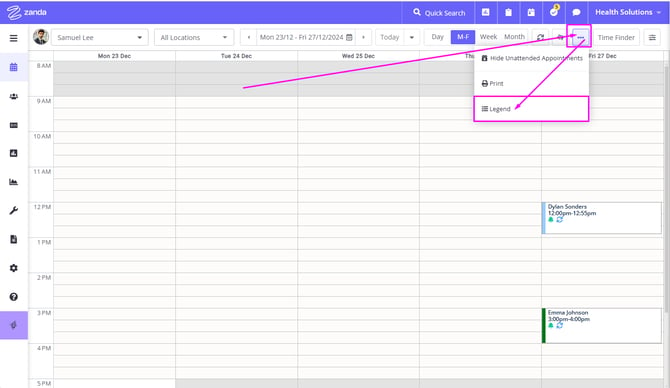
In addition to this support article, you're also able to navigate to a dialog that showcases all these statuses, flags and colours at-a-glance, including any custom appointment Flags and Locations which you have set up in your system.
- To access the calendar legend, click the three dots icon at the top calendar tools panel and select Legend:

- Here's an example of what the Calendar Legend might look like, depending on your account settings:

