%20-%20120%20x%2044.svg)
Stay organised and on top of your work by managing client-related tasks and internal to-dos in one place.
Tasks help you track follow-ups, automate reminders, and take action directly—whether it’s sending a message to a client or managing internal practice work.
In this article:
- Understanding Tasks in Zanda
- Accessing the Tasks Dashboard
- Filtering and Managing Tasks
- Creating Client Tasks Manually
- Creating Practice Tasks
- Editing, Completing, and Deleting Tasks
- Setting Up System Automatic Tasks
- Adding Tasks Actions to Zanda Automations
- Frequently Asked Questions
- Related Articles
Watch video tutorial
In the header of Zanda, you will notice in the top right corner a tick symbol button. This will take you to a list of automatic and manually set upcoming client and practice tasks.
In response to tasks, you can either perform an action like sending an SMS or email using your templates, or you can acknowledge and remove the task from your list.
Important notes
- To view tasks assigned to all users, enable 'View Tasks Assigned to All Users' permission for each eligible user permission in User Menu > Account Settings > Users Management
-
Tasks are not generated for archived clients
-
Tasks are visible up to 7 days in advance.
-
For date-triggered tasks (such as session pack expiry date alerts), this means the task is generated 7 days before the expiry date.
-
For event-triggered tasks (such as the last session in a session pack being allocated to an invoice), the task is generated immediately when the event occurs — not 7 days before anything.
-
- For an overview of recent updates to Tasks, see this article.
Understanding Tasks in Zanda
Zanda includes two types of tasks to help you manage both client care and internal workflows.
Client Tasks
Client Tasks are linked to a specific client and are typically used for communication or follow-ups.
Examples:
-
Send a Happy Birthday message
-
Follow up on a used session pack, authorization, or recurred series of appointments
-
Send a request for a new referral letter
Client Tasks can include email or SMS templates, allowing you to send messages directly from the Tasks page.
Practice Tasks
Practice Tasks are internal tasks that are not linked to a client.
Examples:
-
Prepare monthly reports
-
Order supplies
-
Review marketing activities
Practice Tasks are ideal for team coordination and administrative work. They do not send communications.
Accessing the Tasks Dashboard
You can access Tasks from the top toolbar in Zanda. Find the check icon and click it. Sometimes you'll see a counter next to it with a number - this is a system alert showing you how many active (due) tasks have been generated.

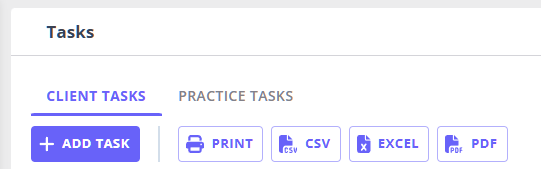
From here, you can switch between:
-
Client Tasks
-
Practice Tasks
Filtering and Managing Tasks
The Tasks page includes tools to help you focus on what matters most.
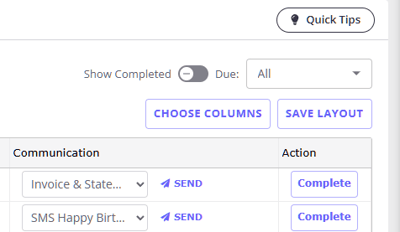
Show Completed
Use the Show Completed toggle to control your view:
-
Off (default): shows only outstanding tasks
-
On: shows both completed and outstanding tasks
Due filter
When you open the Tasks dashboard, it opens by default on the Due Now selection. Use the Due filter to prioritize tasks based on timing, including:
- All
-
Due now
-
Due tomorrow
-
Due this week
-
Due next week
-
Due this month
-
Due later (next 3 months)
This helps you quickly focus on urgent work or plan ahead.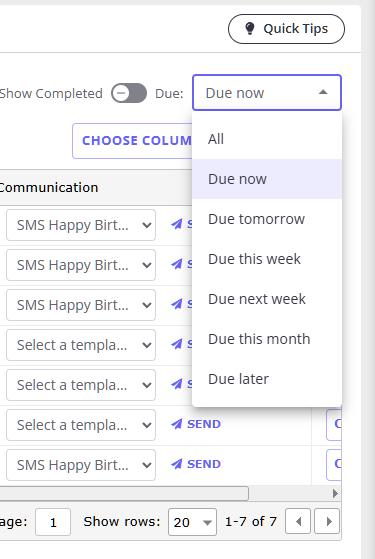
Task grid and layout
Tasks are displayed in a grid with columns such as:
-
Due Date
-
Client (Client Tasks)
-
Task Name
-
Details
-
Assigned To
- Primary practitioner (Client Tasks) — hidden by default; shows the client's primary practitioner, which is helpful when deciding who should pick up a task assigned to Anyone
-
Mobile (Client Tasks)
-
Email (Client Tasks)
-
Communication (Client Tasks)
-
Action
You can:
-
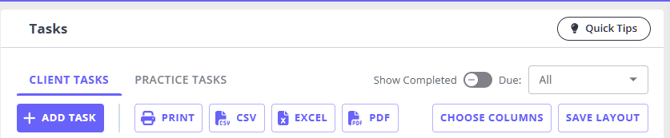
Show or hide columns using the Choose Columns button
-
Save your preferred layout for future use using the Save Layout button
- Export or print your task list
FAQ: Cannot see all tasks details on the dashboard?
You can customize what you see in the Task list by clicking the Choose Columns button.
For example, to see the task notes directly in your view, you'll want to select the Task Details column to add it to your current view.
Here's how to set this up:
- Click the Choose Columns button in your Task list
- Check the Task Details column (and any other columns you'd like to see)
- Click Ok to add the columns to your current view
- Once you have the view set up the way you prefer, click the Save Layout button to save it for future use
This should help you see the essential information without having to click into each individual task.
Creating Client Tasks Manually
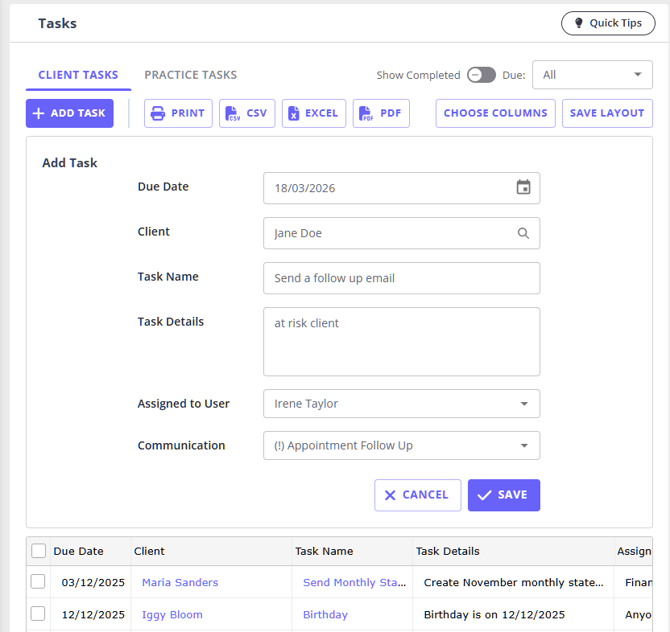
Option 1: Create a manual client task directly on the Tasks dashboard
-
Go to the Client Tasks tab
-
Click + Add Task
-
Complete the required fields:
-
Due Date (defaults to today's date)
-
Client
-
Task Name
-
-
(Optional) Add:
-
Task Details
-
Assigned user
-
Communication template (email or SMS)
-
-
Click Save
The task will appear in your Client Tasks list.
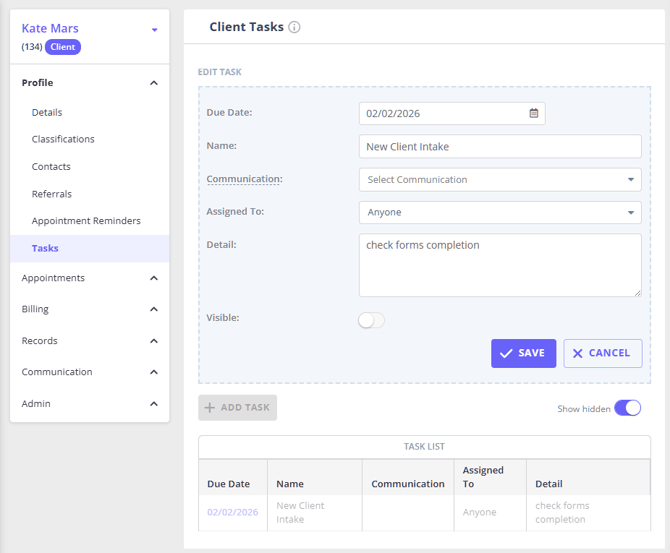
Option 2: Create a manual client task in a client profile > Tasks
- Access the client's profile and navigate to Tasks.
- Click on Add Task.
- Enter Due Date, Name, select the relevant communication template, and assign to a specific user if applicable, add any description you'd like.
- Click Save.
💡 You will see a list of previously created automatic and manual client tasks for this client on this page.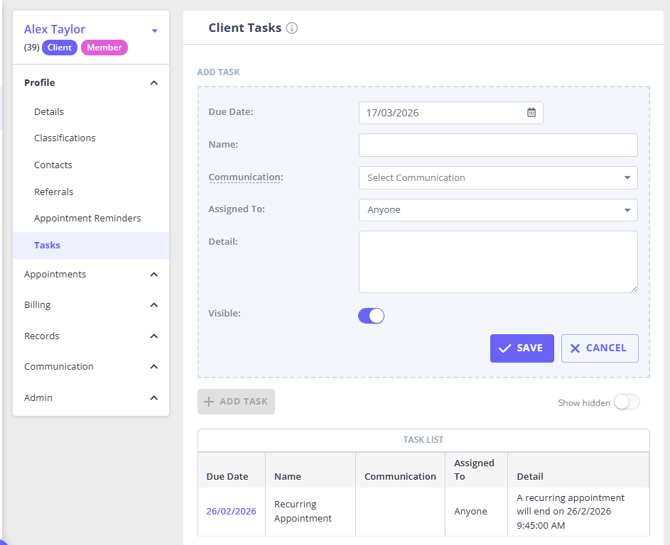
Creating Practice Tasks
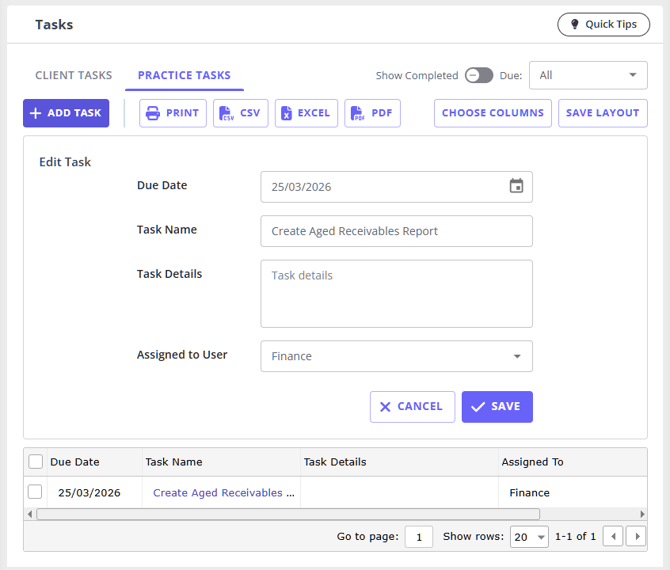
- Click the Tasks icon on the top toolbar
- Go to the Practice Tasks tab
-
Click + Add Task
-
Enter:
-
Due Date (defaults to today's date)
-
Task Name
-
-
(Optional) Add:
-
Task Details
-
Assigned user
-
-
Click Save
The task will appear in your Practice Tasks list.
Editing, Completing, and Deleting Tasks
Editing a task
You can edit a client or a practice task anytime.
-
Click the Task Name in the list
-
Update the details in the task panel that opens
-
Click Save
Completing a task
When you finished working on a task, you can mark it as Complete so you and other users in your team knew it doesn't require your attention anymore.
-
Use the Complete action on an individual task in the Tasks grid.
Completing multiple tasks
You can complete several tasks at once:
-
Select the checkboxes next to tasks
-
Click Complete Selected in the footer
-
Confirm the action
Deleting tasks
-
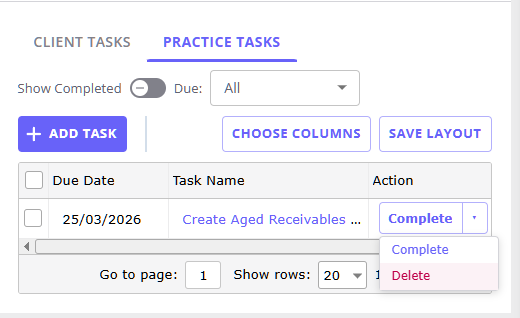
Practice Tasks can be deleted from the task list in the Actions column:
-
Client Tasks remain linked to client activity and are not deleted in the same way
- You can make a client task not visible in a client profile > Tasks page.
- Open a task and turn off the Visible switch.
- Save the task.
- This will hide the task while still keeping it in the clients records.
Can I remove birthday tasks completely?
Birthday reminders are created as Client Tasks when the automatic birthday task is enabled. Removing them completely is two steps:
- Stop new ones being created. Go to User Menu > Account Settings > Communication > Tasks, turn off Create a task to send a message before my clients' birthday, and click Save. From that night on, no new birthday tasks are generated. This is a separate setting from Automations—an empty Automations list does not turn birthday tasks off.
- Clear the ones already there. Existing birthday tasks stay on your dashboard until you action them. Select the birthday Client Tasks on the Tasks dashboard, click Complete Selected, and confirm the action.
Client Tasks stay linked to the client record, so they are not deleted the way Practice Tasks are. If you want a birthday task off the Tasks dashboard for good rather than marked complete, open the task from Client Profile > Tasks, turn off the Visible switch, and save the task. This removes it from the Tasks dashboard as well as the client's Tasks page, while keeping it in the client's records.
Sending Communications From Client Tasks
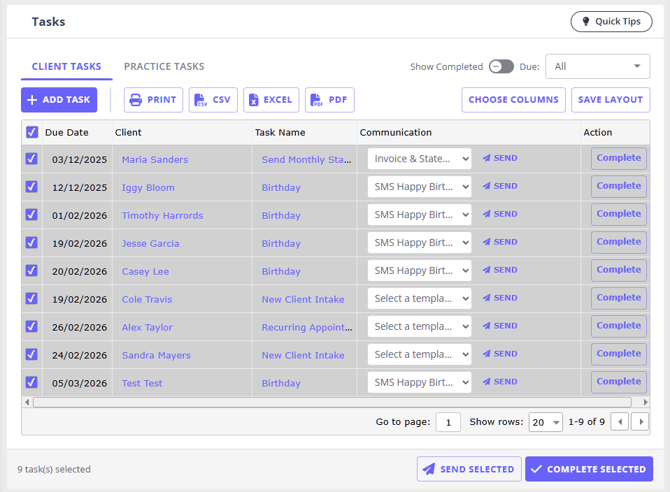
Where enabled, you can send messages to one or multiple clients directly from the Tasks page.
Sending a message to one client:
- Opent the Client Tasks grid and find the client's Task.
- Check that a communication template (SMS or email) is selected in the Communications dropdown.
- Click Send.

Sending bulk communication to multiple clients:
Before you start
Each task where you want to send communication must:
-
Be a Client Task
-
Have a communication template selected
-
Have valid client contact details
Sending messages
-
Select the relevant Client Tasks
-
Click Send Selected
-
Confirm the action
Zanda will:
-
Send emails for tasks with email templates
-
Send SMS for tasks with SMS templates
-
Skip tasks without templates
After sending
-
Successfully sent messages will be confirmed with a pop-up showing a number of successfully sent message
-
Any failed messages will be listed
- You’ll see a message:
“Messages to the following clients could not be sent”, along with the client names.
- You’ll see a message:
-
Tasks are not automatically completed and can be completed separately
Setting Up System Automatic Tasks
Watch video tutorial
You can set up tasks which will be generated automatically when the criteria are met. Here's how:
- Go to User Menu > Account Settings > Communication > Tasks.
- Under the heading 'Automatically Generated Tasks' select what you would like to be reminded about e.g. Client Birthdays, Recurring Appointments finishing, or the end of a Session Pack.
- Click Save.
💡 The 'See Your Current Tasks' button will take you to the Tasks dashboard where you can see the list of your generated automatic and manual tasks that are already due for your attention.
💡 The generated tasks for client birthdays, finishing recurring appointments and expired session packs will show on your tasks dashboard automatically, but you will need to action them (for example, send a birthday SMS message or an email to ask a client to provide a new referral for the next treatment plan) manually.
💡 Turning an automatic task off stops new tasks from being created from that night onwards. It does not remove tasks that have already been generated—those stay on your Tasks dashboard until you action them. Birthday tasks are created for birthdays falling in the next 7 days, so you may still see up to a week of birthday tasks after you switch the setting off. 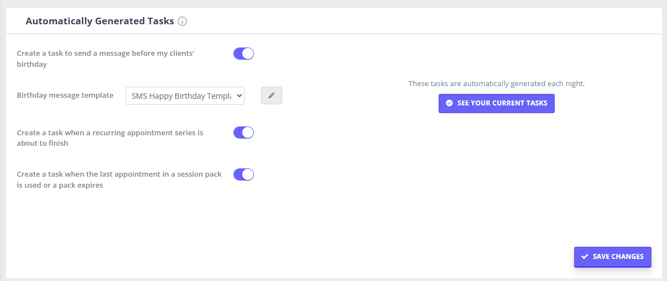
Adding Tasks Actions to Zanda Automations
The Zanda Automations feature enables you to configure automated message sending or task generation based on particular conditions that you can choose. They are a fantastic tool for automating administrative tasks. Use it to automatically generate practice type of tasks for your team!
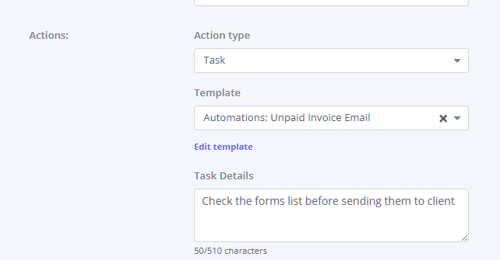
- To set up automations with tasks, go to User Menu > Account Settings > Communication > Automations and create any number of automations for new clients workflows, pre- and post-appointment workflows, unpaid invoices, receipts, and client recalls.
- In the Actions section, select Task.
- In the Template dropdown field, select a communication template to be used with this task (email, SMS or letter).
- In the Task Details text box, you can type in an internal note to your team to provide additional details about this task. The note text is limited to 510 characters.
- When you choose "Task" as your automation action, a new task is generated using the automation name as the title. This task will appear in the Tasks dashboard accessible at the top toolbar of your account screen.
- These tasks are not assigned to any specific user and are connected to a client based on the criteria you have established.
- The due date for each task corresponds to the date it was created by the automation.
Frequently Asked Questions
❓ Can I schedule a one-off email to send to a client later?
For one-off client messages, use a Client Task as a dated reminder rather than an automatic scheduled send. Create the Client Task with the future Due Date, select the client, add the email communication template, then send the email from the Client Tasks grid when the task is due.
For messages that should send automatically, use the workflow that matches the trigger: appointment reminders for appointment-based messages, or Zanda Automations for supported new client, pre-appointment, post-appointment, invoice, recall, and incomplete form workflows.
❓ Why can practitioners see tasks assigned to Anyone?
Anyone means the task has no specific assigned user. These tasks remain visible to the relevant users so the team can pick them up without assigning them to one person first.
For Practice Tasks, users who do not have View Tasks Assigned to All Users can still see tasks assigned to them and tasks assigned to Anyone. Users with View Tasks Assigned to All Users can see practice tasks assigned to any user.
For Client Tasks, visibility also depends on the user's client profile access. Without View Tasks Assigned to All Users, a user can see tasks assigned to them and Anyone tasks for clients they can access. With View Tasks Assigned to All Users, the user can see tasks assigned to other users when their client profile access also allows it.
To change this permission:
- Go to User Menu > Account Settings > Team > Users.
- Open the relevant user profile.
- In Administrative, turn on View Tasks Assigned to All Users.
- Click Save.
❓ I turned the birthday task setting off, so why are birthday tasks still on my Tasks list?
Turning the setting off only stops new birthday tasks from being created—it does not clear tasks that were already generated. Two things usually explain what you are seeing:
- Birthday tasks are created for birthdays in the next 7 days, so tasks dated up to a week ahead may already have been created before you switched the setting off.
- Uncompleted Client Tasks stay on the Tasks dashboard for up to 12 months, so older birthday tasks you never actioned are still listed.
To clear them, select the birthday tasks on the Tasks dashboard and click Complete Selected. Use the Due filter to see the full list, and turn on Show Completed to check which ones you have already actioned.
Related Articles
- User Permissions for Practitioners - Learn how practitioner profile access and administrative permissions affect what practitioners can see.
- Managing Users - Review user profile settings and administrative permissions.
- Updates to Tasks Functionality and Layout - See recent changes to the Tasks dashboard.