Generating Medicare Invoices & Receipts (AUS Only)
Set up Medicare Claiming on Zanda in five key steps.
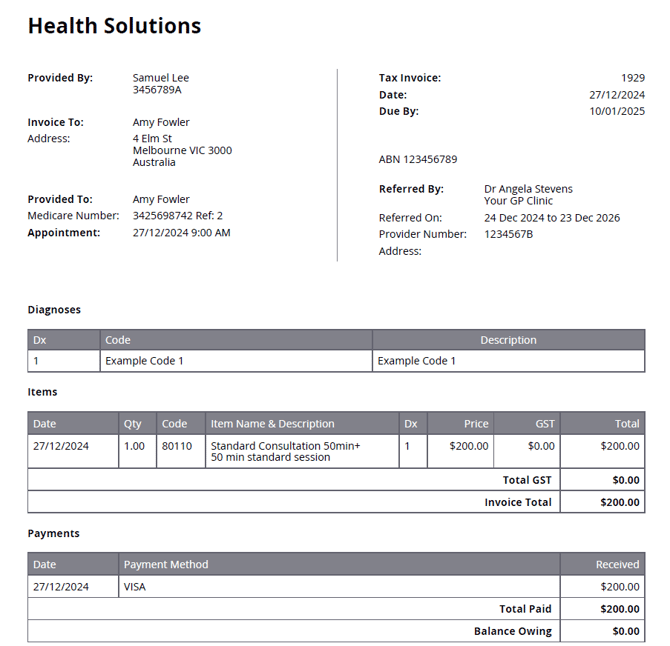
Zanda can automatically include all the required information on invoices to ensure they comply with Medicare requirements. Information that can be automatically added includes your Provider Number, the referrer's details and Provider Number, the referral date, and the Medicare Item Number of the service you provided.
( Want to connect directly with Medicare to process online claims? Learn how to get set up here? It is completely free!)
Important
You must fill out your HW027 form to register for Online Claiming. If you or any providers that submit claims through your account have not filled out this form previously please do so immediately. Details on how to fill out the form and submit it to Medicare can be found here. Please keep Question 3 on the form blank.
There are five key steps to cover:
- Adding your Medicare Provider Number
- Adding your Medicare Related Services
- Adding Your Referral Sources
- Adding the Referral Information to a Client's Profile
- Processing an Appointment and Generating a Medicare Compliant Invoice/Receipt
Adding your Medicare Provider Number
- First to ensure your account has Medicare available as an insurance option go to Settings → Payments → Insurers. If Medicare is not on the list, you can add it by clicking on +Add Insurer

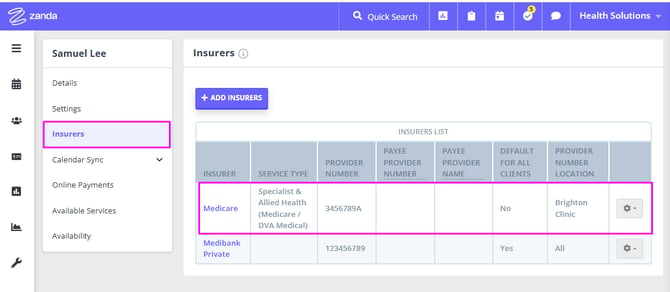
- To automatically include your Medicare Provider Number on all your invoices you generate, navigate to Settings > Team > Practitioners, and then add your provider number details under the Insurers section (more details on adding your provider number can be found here).
Adding your Medicare Related Services
Setup the services you provide ensuring you include a description of any Medicare Service / Item Number details.
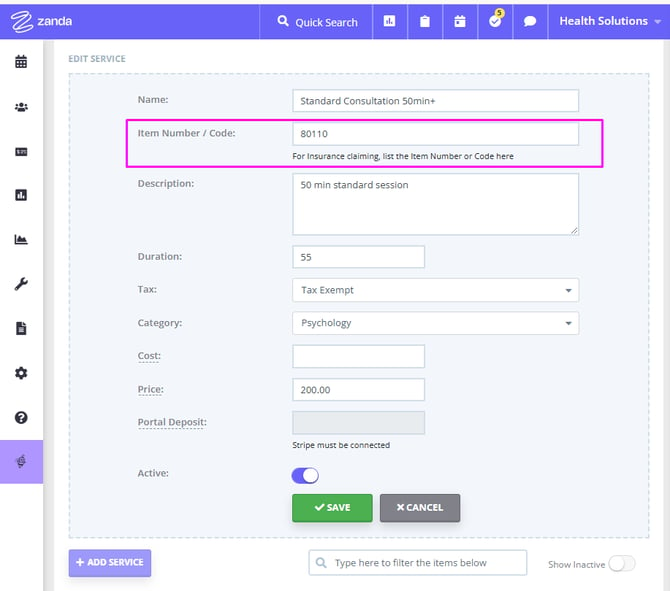
- To do this go to Settings > Billing > Services and select Add Service.
- In the title or description, sections include the Medicare description e.g. "Standard Consultation 50min+" and in the Code section add the Medicare item code (such as 80110).
- You only have to set up your services once and then they appear in a drop-down list for you to select for any client you see.
Adding Your Referral Sources
Add your referral sources e.g. GPs who refer to you. To do this
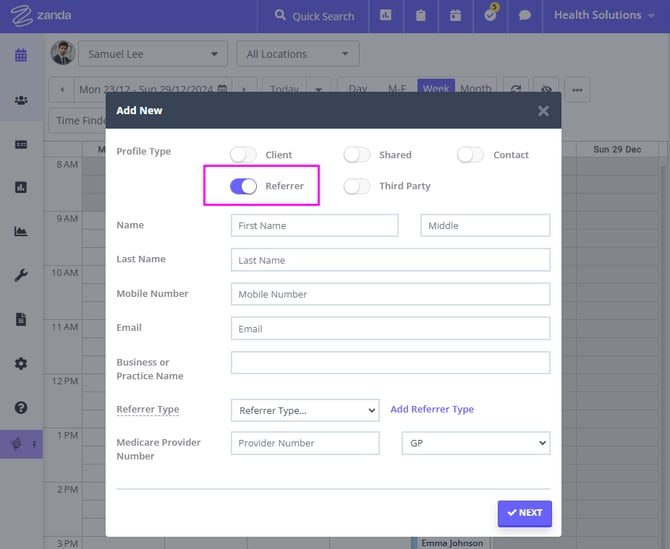
- go to People → Create and select Referrer.
- Add the referrer's basic details and click ✓ Next.
- You can then enter their Medicare provider number and referrer type (such as GP). Click ✓ Save Changes.
- You only have to add referrer once. Once added they will appear in a Referrers drop-down list in the system so that you can easily link them to any clients they refer.
Adding the Referral Information to a Client's Profile
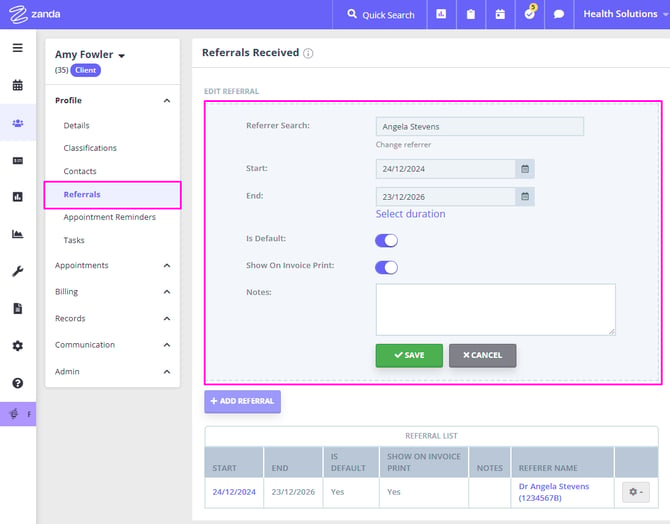
- Go to the client's record and into the Referrals tab.
- Click + New Referral and then search for the referrers name (you can also add new referrers at this step).
- You can then add the start and end date of the referral, or select a duration and add any notes for the referral.
- Ensure that Show Referral on Invoice Print option is ticked so that the referral details appear on the client's invoice.
- If Default Referral for New Invoices is ticked this referral will be linked to all new invoices for the client.
Processing an Appointment and Generating a Medicare Compliant Invoice/Receipt
- Anytime the client has an appointment with you simply click on the appointment in the calendar, select the Medicare service you provided, select the payment method they used (if any) and then click Save.

- To print or preview the invoice click Invoice > Print Invoice your invoice will be generated and will include all the required Medicare information.
Hint 💡
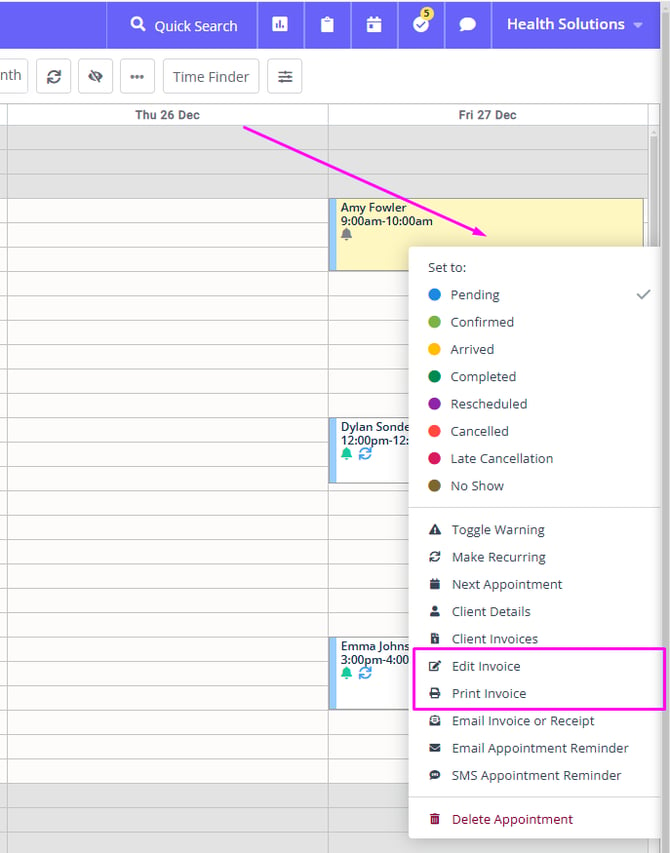
You can also right-click an appointment and select Print Invoice or Edit Invoice to quickly print or access the edit invoice page for that appointment.
