Setting Up Your Client Portal Branding
Learn how to set up your individual client portal branding
In this article:
- Overview
- Enabling Your New Client Portal Branding Features
- Setting Up Your Client Portal Branding
- FAQs
- Banner Image Library
Overview
Your Client Portal is often the first point of contact between your practice and your clients, so having a cohesive and professional look is essential. Zanda Client Portal branding features give you the flexibility to set the visual experience to match your practice’s identity — from your logo and brand color to a personalized banner image.
With these styling tools, you can tailor the Client Portal so it feels aligned with your business, helps clients recognize your brand instantly, and creates a welcoming, consistent experience across every interaction. Whether you want to apply your existing brand colors, update your logo, or explore a library of professionally designed banner images, the setup process is quick, intuitive, and fully adjustable at any time.Enabling Your New Client Portal Branding Features
- Navigate to Settings > Schedule > Client Portal > Branding and turn ON the 'Enable New Client Portal Styling' switch. Save the page.
- Once the page has refreshed, the new styling options for your client portal will appear. Let's explore the available settings to customize your branding.
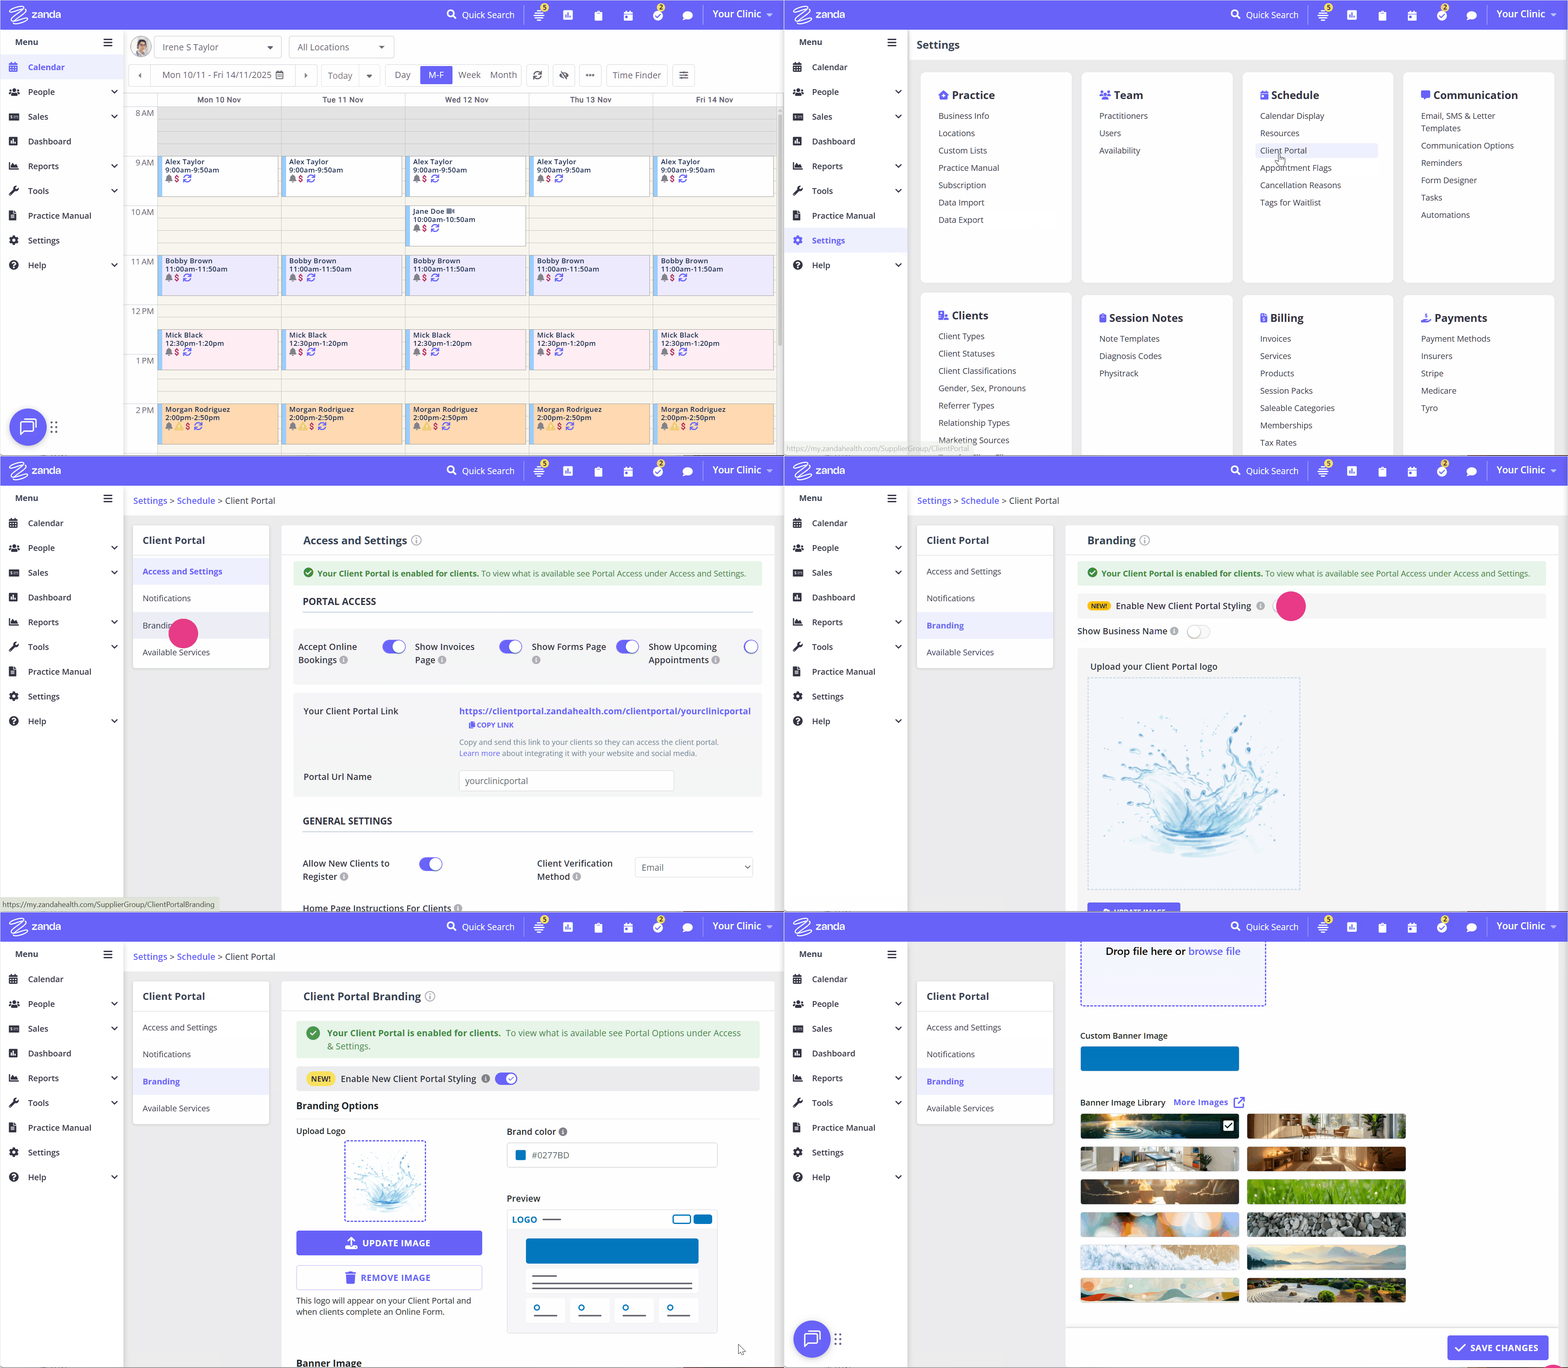
Setting Up Your Client Portal Branding
The following branding options are available:
Uploading and managing business logo:
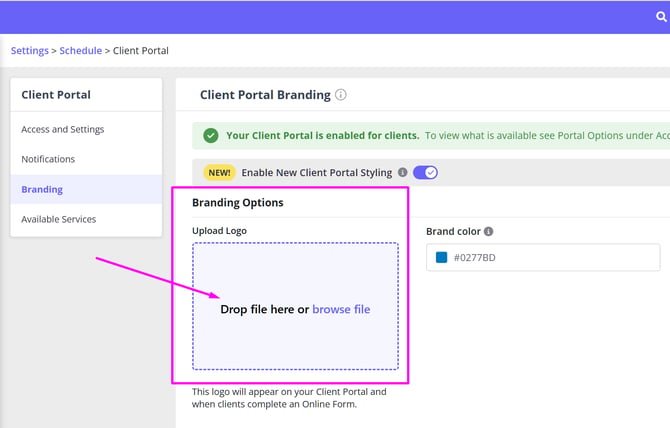
You can upload your business logo image, which will appear on your Client Portal and when clients complete an online form.
- Drag and drop logo image file in the designated field or click the 'browse file' link.
- Save the page.
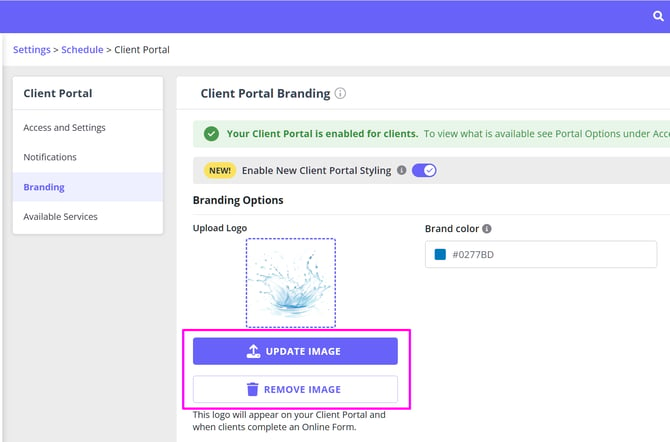
- If you need to make changes, you can easily update or remove your logo image at any time using the available options.
Selecting brand color for your client portal
The next styling option available to you is selecting and applying a unified brand color.
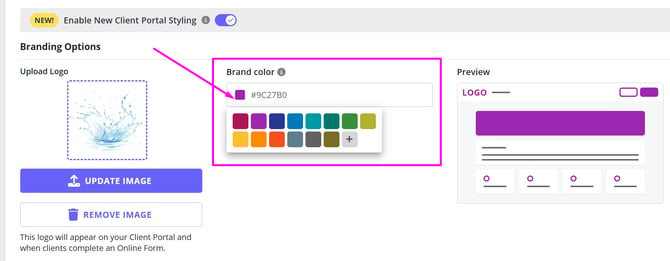
- Click in the color field and choose one of the available default brand colors.
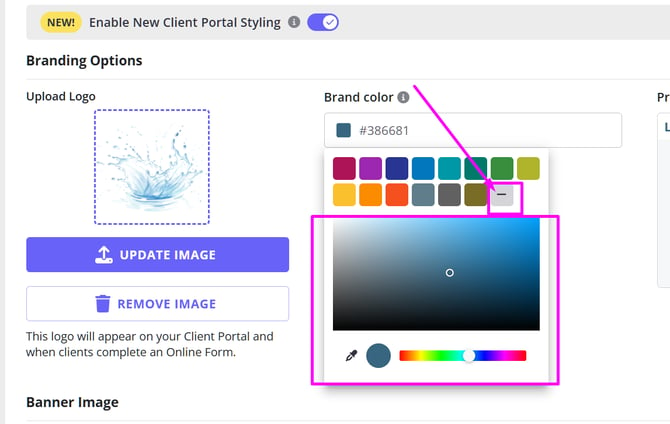
- Click the '+' button to pick custom color
- Enter your brand color HEX code in the color field.
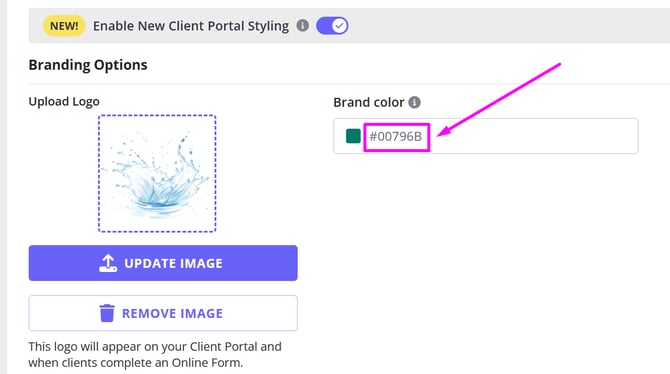
Your selected brand color will be applied throughout your client portal settings, including font and icon colors, to deliver a consistent and cohesive experience.
- ❗ Scroll to the bottom of the page to choose whether to apply your brand color overlay to the header banner.
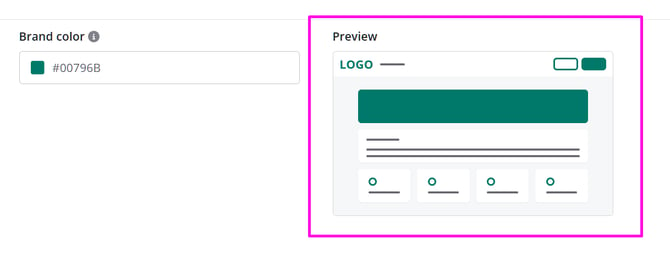
The Preview image shows how your client portal will look, highlighting where your chosen brand color appears throughout the layout.
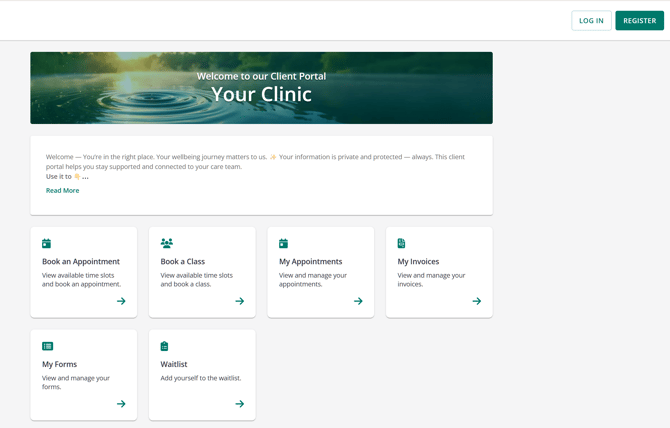
Uploading and managing banner image
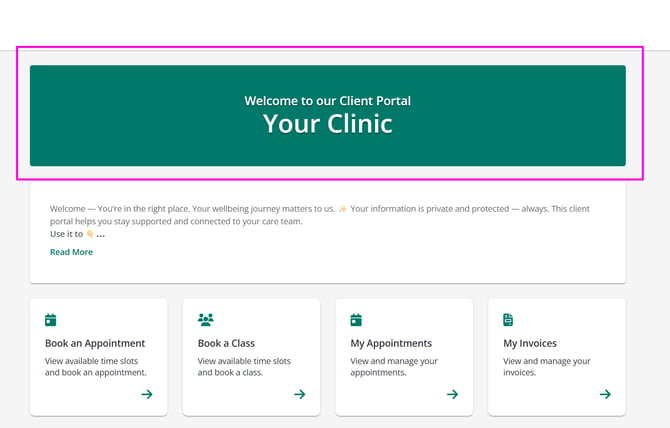
- A default custom banner image is applied to a client portal when the new client portal styling is enabled. This default banner image is a solid color block of the selected brand color.

- Your Zanda account business name with the welcome message will be written on this banner image on your client portal home page.
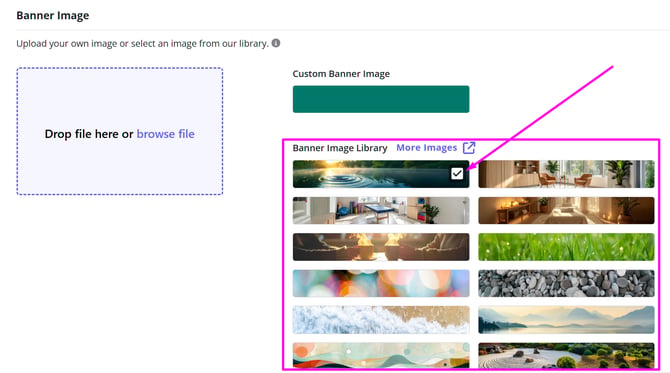
- You can select one of the 12 banner images we provide on the Branding page to use as a header image instead of the solid color block. Save the changes to see the selected image on your client portal.
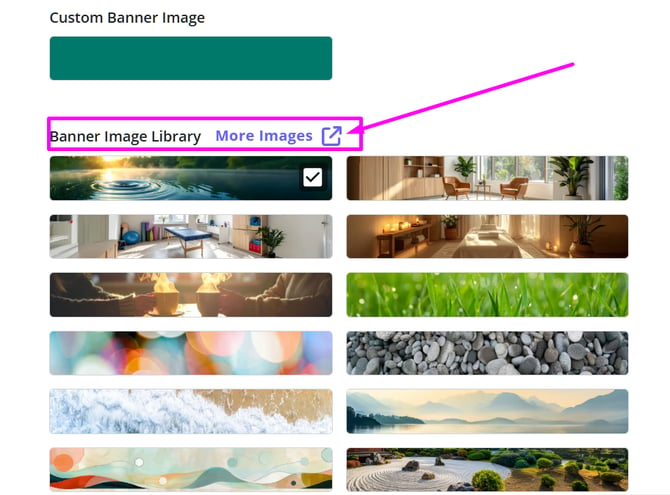
- For additional options, explore the extensive banner image library available in the Zanda knowledge base. Click the ‘More Images’ link to view the full article and browse a wide variety of images you can use for your client portal header.
- You can upload a banner image either from our image library or use a custom image created specifically for your brand by selecting it in the provided upload field.
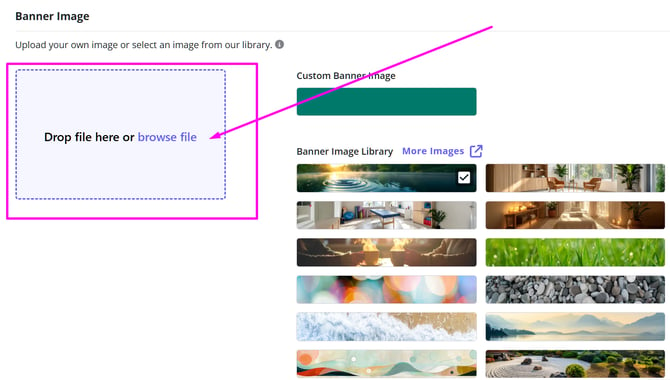
- Click the 'i' information tooltip to check the recommended image dimensions for the banner image. Our recommended image dimensions are 1280px x 200px or an aspect ratio of 32:5.
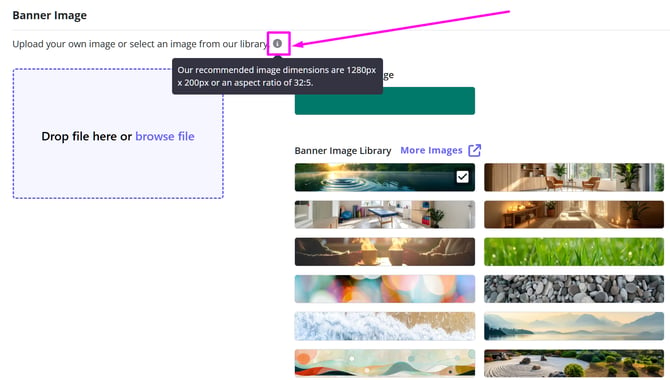
- Drop your file in the dedicated field, or click browse file
- Select the file you wish to upload
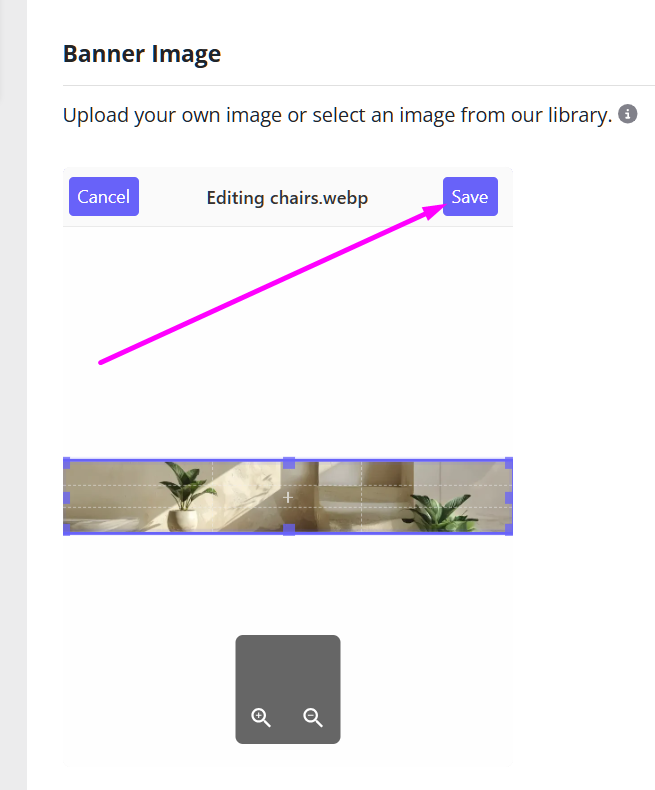
- Once the file is uploaded, click Save
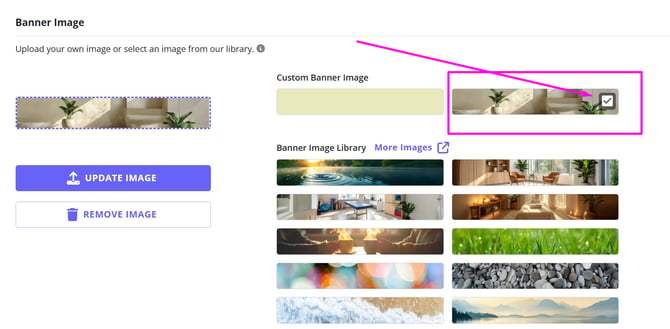
- The uploaded and saved file will appear next to the custom banner, make sure you select the uploaded image as your new header banner image:
- Click 'Save Changes' button to save the whole page settings.
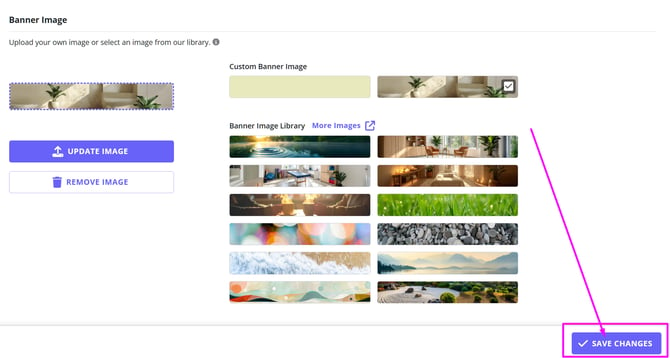
You can choose to apply brand tint on banner image on the front page of the client portal. To do so, enable the switch below the banner image library:
💡 Pro-tip: Want to preview how your client portal looks on a mobile device? You can simulate smaller screens right from your browser:
-
Chrome:
Go to ⋮ (three dots) > More tools > Developer Tools, then click the 'Toggle Device Toolbar' icon (next to the 'Elements' tab). On the left, click 'Dimensions' and select a device to preview. -
Safari (Mac):
Go to Safari > Settings > Advanced, then tick “Show Develop menu in menu bar”. From the menu bar, go to Develop > Enter Responsive Design Mode and choose a device.
This is a great way to ensure your portal looks just right for clients using phones or tablets.
Frequently Asked Questions
❓Does the Zanda brand color picker use Pantone colors?
No, the Zanda brand color picker does not use Pantone colors.
Zanda uses a standard HEX and RGB color picker, which is common across modern web applications. The colors displayed in the picker — including preset swatches — are digital color values, not Pantone swatches.
Why Pantone colors are not used
-
Pantone colors use formats like PMS 186 C, P 48-8 U, or Pantone 7724 C.
These cannot be entered as HEX values. -
The color field in Zanda accepts HEX codes (e.g.,
#28565B) and RGB values. -
The preset swatches in the color picker are web-safe or curated UI colors, not Pantone color.
-
Pantone color cannot be matched exactly in RGB/HEX without licensed Pantone conversion data.
What color formats Zanda supports?
Zanda currently supports:
-
HEX values
-
RGB values (via the color slider and spectrum)
-
Preset swatches included in the UI
These formats are designed for digital consistency and accessibility in a web environment.
How to match a Pantone color in Zanda?
If your brand uses Pantone colors, you can still apply a close match:
-
Use a Pantone-to-HEX converter (online tools or Adobe software).
-
Copy the HEX value generated.
-
Paste the HEX code into the Brand color field in Zanda.
This will apply the closest digital equivalent of your Pantone color.
❓ FAQ: Do you provide banner size dimensions (in pixels)?
Yes. For the best display quality on the client portal, we recommend using banners with the following dimensions:
-
1280 px × 200 px
-
Or an equivalent 32:5 aspect ratio
This ensures your banner displays clearly across different screen sizes and maintains consistent visual alignment with the portal layout.
If you’re working with a designer, feel free to share these dimensions so they can prepare an image that fits seamlessly within the portal.
Banner Image Library
💡 ProTip: to save a copy of an image from the library to your device,
- right-click an image you chose with your mouse cursor
- select 'Save image as...'
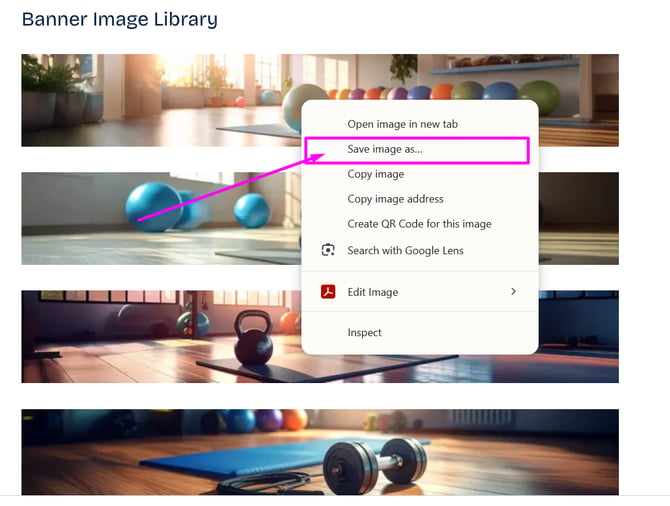
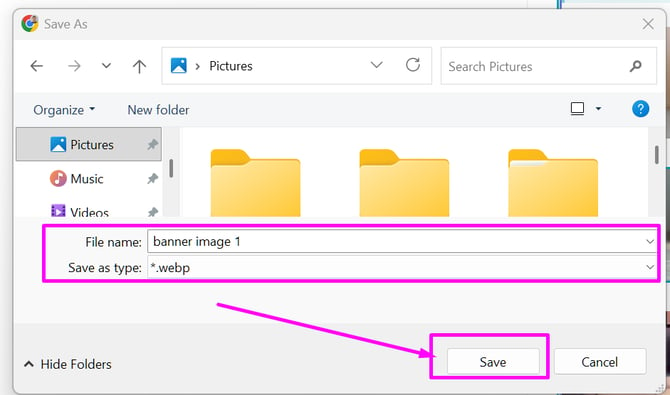
- in the modal that opens, optionally type in the file name, leave 'Save as type' *.webp
- click 'Save'
