Here you can find example communication templates which can be used with Zanda Automations feature. Copy a template you'd like to use and add it to your Zanda account in Tools > Communication > Templates > New Template.
Note:
If you created your Zanda account after May, 15 2025,
- These communication templates are already available to use in Tools > Communication > Templates.
- They are also linked to inactive default automations found in User Menu Account Settings > Communication > Automations > Show Inactive. Activate the automations you'd like to use and adjust automation conditions as needed.
In This Article:
- Creating a New Communication Template
- List of Templates:
- New Client Intake Email
- Pre-Appointment SMS Template - Telehealth Link
- Pre-Appointment General Info Email
- Pre-Appointment Telehealth Email
- Pre-Appointment Telehealth Email With Detailed Instructions
- Post-Appointment Email Template – General Follow-Up
- Post-Appointment Email Template –Patient Satisfaction Survey
- Post-Appointment SMS Template – General Check-In
- Recall Automation Email Template
- Recall SMS Template
- Unpaid Invoices Automation
- Paid Invoices Automation Email
- Paid Invoices Automation SMS
- Monthly Superbill Automated Email Template
- Monthly Statement Automated Email Template
- Incomplete Forms Automated Email Templates
- Incomplete Forms Automated SMS Templates
How To Create A New Communication Template
In Zanda, you can set templates for different types of communication messages, including SMS, email and letters.
The Zanda Automations feature allows you to create automates messages, using the SMS and email templates. In this article, we offered you a set of default communication templates which can be used with the available automation types.
💡Pro Tip: If you have AI features enabled, you can use BizzyAI: Write to help draft these automation templates. Look for the AI Write button in the template editor. Learn more about BizzyAI Write for Communication Templates.
Here's how you can set up your own communication templates, using the drafts we provided here.
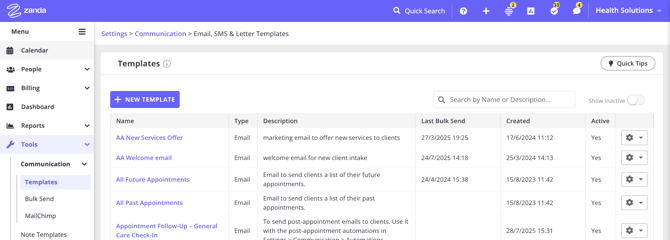
- Navigate to Tools > Communication > Templates, or User Menu > Account Settings > Communication > Email SMS & Letter Templates.
- Click '+ New Template' button at the top of the page.
- Select the type of a template you'll create (SMS or Email).
- Fill in the provided template settings fields.
- To create the message body in the Content box, copy the template body text provided in this article.
- If copying text from the templates in this article or from any other source, switch to the 'Code View' and paste it in there.
- Switch back to the text view.
- If copying text from the templates in this article or from any other source, switch to the 'Code View' and paste it in there.
- Edit the template body text as necessary to fit your business needs and processes.
- Make sure you added the online forms merge fields (copy them from the Available Merge Fields list available with each template you're creating.
- Make sure you added the online forms merge fields (copy them from the Available Merge Fields list available with each template you're creating.
- Once you are happy with the template body text and settings, save it.
- Now you'll be able to select these templates when setting up your automations in User Menu > Account Settings > Communication > Automations and User Menu > Account Settings > Billing > Invoices.
New Client Intake Email
Name: Automations: New Client - Intake Email
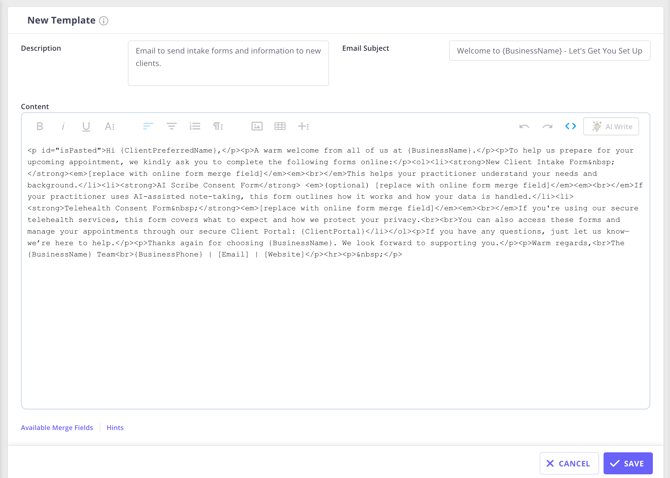
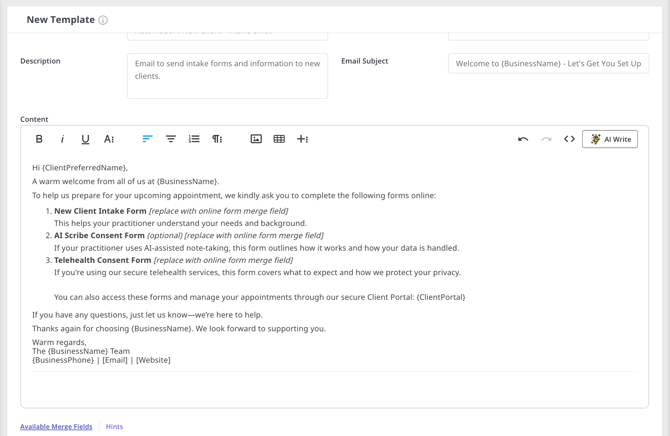
Description (for Zanda users) Email to send intake forms and information to new clients. Use with New Client automations in User Menu > Account Settings > Communication > Automations.
Subject Line: Welcome to {BusinessName}–Let’s Get You Set Up
Body:
Hi {ClientPreferredName},
A warm welcome from all of us at {BusinessName}.
To help us prepare for your upcoming appointment, we kindly ask you to complete the following forms online:
- New Client Intake Form [replace with online form merge field]
This helps your practitioner understand your needs and background. - AI Scribe Consent Form (optional) [replace with online form merge field]
If your practitioner uses AI-assisted note-taking, this form outlines how it works and how your data is handled. - Telehealth Consent Form [replace with online form merge field]
If you're using our secure telehealth services, this form covers what to expect and how we protect your privacy.
You can also access these forms and manage your appointments through our secure Client Portal: {ClientPortal}
If you have any questions, just let us know—we’re here to help.
Thanks again for choosing {BusinessName}. We look forward to supporting you.
Warm regards,
The {BusinessName} Team
{BusinessPhone} | [Email] | [Website]
HTML code you can copy:
<p>Hi {ClientPreferredName}</p><p><br></p><p dir="ltr">A warm welcome from all of us at {BusinessName}.<br style="box-sizing: border-box; scrollbar-color: rgba(79, 76, 76, 0.2) rgba(170, 170, 170, 0.2); scrollbar-width: thin;"><br style="box-sizing: border-box; scrollbar-color: rgba(79, 76, 76, 0.2) rgba(170, 170, 170, 0.2); scrollbar-width: thin;"></p><p dir="ltr">To help us prepare for your upcoming appointment, we kindly ask you to complete the following forms online:</p><ol><li><p><strong>New Client Intake Form</strong> [replace with online form merge field]<br style="box-sizing: border-box; scrollbar-color: rgba(79, 76, 76, 0.2) rgba(170, 170, 170, 0.2); scrollbar-width: thin;">This helps your practitioner understand your needs and background.</p></li><li><p><strong>AI Scribe Consent Form</strong> (optional) [replace with online form merge field]<br style="box-sizing: border-box; scrollbar-color: rgba(79, 76, 76, 0.2) rgba(170, 170, 170, 0.2); scrollbar-width: thin;">If your practitioner uses AI-assisted note-taking, this form outlines how it works and how your data is handled.</p></li><li><p><strong>Telehealth Consent Form</strong> (optional) [replace with online form merge field] - If you're using our secure telehealth services, this form covers what to expect and how we protect your privacy.</p></li></ol><p>You can also access these forms and manage your appointments through our secure Client Portal: {ClientPortal}<br><br></p><p dir="ltr">If you have any questions, just let us know—we’re here to help.<br><br></p><p dir="ltr">Thanks again for choosing {BusinessName}. We look forward to supporting you.<br><br></p><p dir="ltr">Warm regards,<br style="box-sizing: border-box; scrollbar-color: rgba(79, 76, 76, 0.2) rgba(170, 170, 170, 0.2); scrollbar-width: thin;">The {BusinessName} Team<br style="box-sizing: border-box; scrollbar-color: rgba(79, 76, 76, 0.2) rgba(170, 170, 170, 0.2); scrollbar-width: thin;">{BusinessPhone} | [Email] | [Website]</p>
Pre-appointment SMS Template - Telehealth Link
⚠️ * Important:
❗Pre-appointment SMS actions differ from appointment reminders and do not include advanced features such as retry attempts for failed sends, AM/PM delivery scheduling, or automated reply handling to update appointment statuses.
✔️ We recommend using these pre-appointment SMS actions to share additional appointment details—such as location, practitioner, service, or telehealth link—in addition to your standard reminders.
Message Type SMS
Name: Automations: Pre-appointment Telehealth Link
Description: An example of a SMS that can be used in the pre-appointment automation to share the telehealth link with clients that have a telehealth appointment
Content:
Join your session with {AppointmentPractitionerShortName} here: {ClientTelehealthUrl}
Pre-Appointment General Info Email
Name: Pre-Appointment Information – General
Description (for Zanda users) Email to send essential details and instructions ahead of an upcoming appointment. Use with pre-appointment automations in User Menu > Account Settings > Communication > Automations.
Subject Line: Preparing for Your Appointment at {BusinessName}
Body:
Hi {ClientPreferredName},
We’re looking forward to seeing you soon at {BusinessName}.
Here are a few details to help you get ready for your upcoming appointment:
Appointment Details
Date: {AppointmentDate:ddd d, MMM}
Time: {AppointmentStartTime} - {AppointmentEndTime}
Practitioner: {AppointmentPractitionerFullName}
Location: {AppointmentLocationName}
Before You Arrive
If you haven’t done so yet, please complete your pre-appointment forms using our secure Client Portal {ClientPortal} or via these links:
- New Client Intake Form [replace with online form merge field]
- Telehealth Consent Form (if applicable) [replace with online form merge field]
- AI Scribe Consent Form (if applicable) [replace with online form merge field]
Attending via Telehealth?
If your appointment is online, here is your meeting link. Click it 5 minutes before your appointment time to join the session. {ClientTelehealthUrl}
If you have any questions or need to make changes to your booking, just reach out—we’re here to help.
Warm regards,
The [Practice Name] Team
{BusinessPhone} | [Email] | [Website]
HTML code you can copy:
<p dir="ltr" id="isPasted">Hi {ClientPreferredName},<br><br></p><p dir="ltr">We’re looking forward to seeing you soon at {BusinessName}.<br><br></p><p dir="ltr">Here are a few details to help you get ready for your upcoming appointment:<br><br></p><p dir="ltr"><strong>Appointment Details</strong><br>Date: {AppointmentDate:ddd d, MMM}<br>Time: {AppointmentStartTime} - {AppointmentEndTime}<br>Practitioner: {AppointmentPractitionerFullName}<br>Location: {AppointmentLocationName}<br><br></p><p dir="ltr"><strong>Before You Arrive</strong><br>If you haven’t done so yet, please complete your pre-appointment forms using our secure Client Portal {ClientPortal} or via these links:</p><ul><li><p>New Client Intake Form [replace with online form merge field]</p></li><li><p>Telehealth Consent Form (if applicable) [replace with online form merge field]</p></li><li><p>AI Scribe Consent Form (if applicable) [replace with online form merge field]</p></li></ul><p dir="ltr"><strong>Attending via Telehealth?</strong><br>If your appointment is online, here is your meeting link. Click it 5 minutes before your appointment time to join the session. {ClientTelehealthUrl}<br><br></p><p dir="ltr">If you have any questions or need to make changes to your booking, just reach out — we’re here to help.<br><br></p><p>Warm regards,<br>The [Practice Name] Team<br>{BusinessPhone} | [Email] | [Website]</p>
Pre-Appointment Telehealth Email
Name: Pre-Appointment Information – Telehealth
Description (for Zanda users) Email to send essential details and instructions ahead of an upcoming telehealth appointment. Use with pre-appointment automation in User Menu > Account Settings > Communication > Automations.
Subject Line: Preparing for Your Telehealth Appointment at {BusinessName}
Body:
Hi {ClientPreferredName},
We’re looking forward to seeing you soon at your telehealth appointment with {BusinessName}.
Here are a few details to help you get ready for your upcoming appointment:
Appointment Details
Date: {AppointmentDate:ddd d, MMM}
Time: {AppointmentStartTime} - {AppointmentEndTime}
Practitioner: {AppointmentPractitionerFullName}
Your telehealth meeting link: {ClientTelehealthUrl}
Before You Arrive
If you haven’t done so yet, please complete your pre-appointment forms:
- New Client Intake Form [replace with online form merge field]
- Telehealth Consent Form [replace with online form merge field]
- AI Scribe Consent Form (if applicable) [replace with online form merge field]
Attending via Telehealth
Here is your meeting link. Click it 5 minutes before your appointment time to join the session. {ClientTelehealthUrl}
If you have any questions or need to make changes to your booking, just reach out—we’re here to help.
Warm regards,
The {BusinessName} Team
{BusinessPhone} | [Email] | [Website]
HTML code you can copy:
<p dir="ltr" id="isPasted">Hi {ClientPreferredName}<br><br></p><p dir="ltr">We’re looking forward to seeing you soon at your telehealth appointment with{BusinessName}.<br><br></p><p dir="ltr">Here are a few details to help you get ready for your upcoming appointment:<br><br></p><p dir="ltr"><strong>Appointment Details</strong><br>Date: {AppointmentDate:ddd d, MMM}<br>Time: {AppointmentStartTime} - {AppointmentEndTime}<br>Practitioner: {AppointmentPractitionerFullName}<br>Your telehealth meeting link: {ClientTelehealthUrl}<br><br></p><p dir="ltr"><strong>Before You Arrive</strong><br>If you haven’t done so yet, please complete your pre-appointment forms:</p><ul><li><p>New Client Intake Form [replace with online form merge field]</p></li><li><p>Telehealth Consent Form [replace with online form merge field]</p></li><li><p>AI Scribe Consent Form (if applicable) [replace with online form merge field]</p></li></ul><p dir="ltr"><strong>Attending via Telehealth</strong><br>Here is your meeting link. Click it 5 minutes before your appointment time to join the session. {ClientTelehealthUrl}<br> </p><p dir="ltr">If you have any questions or need to make changes to your booking, just reach out — we’re here to help.<br><br></p><p>Warm regards,<br>The {BusinessName} Team<br>{BusinessPhone} | [Email] | [Website]</p>
Pre-Appointment Telehealth Email With Detailed Instructions
Name: Automations: Pre-Appointment Information – Telehealth With Detailed Instructions
Description (for Zanda users) Email to send detailed instructions ahead of an upcoming telehealth appointment. Use with pre-appointment automation in User Menu > Account Settings > Communication > Automations.
Hi {ClientPreferredName}
We've confirmed your telehealth booking with {AppointmentPractitionerFullName} at {BusinessName}.
Here is your telehealth appointment link: {ClientTelehealthUrl}
Before your appointment
To get ready for your telehealth video appointment, we encourage you to read the following information:
What is a telehealth video appointment?
A telehealth video appointment allows you to access health services over a video conference call. It is a useful means of communication with your practitioner when visiting the clinic is not feasible.
Preparing for a telehealth video appointment
Ensure you have the following:
- A computer, tablet, or mobile phone with a video camera and microphone
- A browser such as Safari, Chrome, or Firefox installed and updated to the latest version
- A Zoom App downloaded and installed on your desktop or mobile device (recommended but not required)
- For a Mobile App, go to your app store (App Store or Google Play), search for ‘Zoom Cloud Meetings’, tap Download, and follow the steps
- For a Desktop App (to use on a computer), go to zoom.us/download, click Download under Zoom Client for Meetings, open the file, and follow the steps to install
- A stable internet connection
- A quiet and private room to complete the call from
- Somewhere to write down notes from your practitioner during the call
How to access the telehealth video appointment
- Five minutes before your appointment, click on the link provided at the top of this email.
- On the ‘Join a Telehealth Session’ screen, click ‘‘Join with App’ to join your session with the Zoom app you installed.
We recommend using the Zoom app for the best session experience. However, you will be able to join the session in your browser. Click ‘Join in browser’ to access this option.
Your browser will request access to your camera and microphone so your practitioner can see and hear you, so make sure you allow access. Check your browser settings and unblock video and audio if you can’t see the video of yourself.
If you are unsure about how to do this, please click on the relevant browser for instructions:
3. Wait for your practitioner to join the video call.
The telehealth platform
This telehealth platform is provided by your clinic via the Zanda practice management platform, which leverages the software and technology of Zoom Telehealth, a third-party provider. Telehealth calls are secure, private, and not automatically recorded by the platform or the software provider. Your practitioner may record the session with your permission for clinical or administrative purposes. All call data is fully encrypted, and Zoom does not have access to any of your personal information.
Privacy and Terms of Service
Your health practitioner may collect personal information about you (which may include sensitive information) for the purposes of providing you with health services or enabling the telehealth appointment. By using the telehealth service you agree to {BusinessName} Terms & Conditions, and to its collection and handling of your personal and sensitive information in accordance with its Privacy Policy.
Sincerely,
The {BusinessName} Team
{BusinessPhone} | [Email] | [Website]
HTML code you can copy:
<p>Hi {RecipientPreferredName},<br><br></p><p>We've confirmed your telehealth booking with {AppointmentDiaryFullName} at {BusinessName}.<br>Here is your telehealth appointment link: {ClientTelehealthUrl}</p><p><span style="font-size: 12pt;"><strong>Before your appointment</strong></span></p><p>To get ready for your telehealth video appointment, we encourage you to read the following information:</p><p><span style="font-size: 12pt;"><strong>What is a Telehealth video appointment?</strong></span></p><p>A telehealth video appointment allows you to access health services over a video conference call. It is a useful means of communication with your practitioner when visiting the clinic is not feasible.</p><p><span style="font-size: 12pt;"><strong>Preparing for a Telehealth video appointment</strong></span></p><p>Ensure you have the following:</p><ul><li>A computer, tablet, or mobile phone with a video camera and microphone</li><li>A browser such as Safari, Chrome, or Firefox installed and updated to the latest version</li><li>A Zoom App downloaded and installed on your desktop or mobile device (recommended but not required)<ul><li>For a Mobile App, go to your app store (App Store or Google Play), search for ‘Zoom Cloud Meetings’, tap Download and follow the step.</li><li>For a Desktop App (to use on a computer), go to zoom.us/download, click Download under Zoom Client for Meetings, open the file and follow the steps to install</li></ul></li><li>A stable internet connection</li><li>A quiet and private room to complete the call from</li><li>Somewhere to write down notes from your practitioner during the call</li></ul><p><span style="font-size: 12pt;"><strong>How to access the Telehealth video appointment</strong></span></p><p><strong>1. Five minutes before your appointment click on the link</strong> provided at the top of this email.</p><p><strong>2. On the ‘Join a Telehealth Session’ screen click ‘‘Join with App’</strong> to join your session with the Zoom app you installed. </p><p>We recommend using the Zoom app for the best session experience. However, you will be able to join the session in your browser, click ‘Join in browser’ to access this option. </p><p>Your browser will request access to your camera and microphone for your practitioner can see and hear you, so make sure you allow access. Check your browser settings and unblock video and audio if you can’t see the video of yourself.</p><p>If you are unsure about how to do this please click on the relevant browser for instructions:</p><ul><li><a rel="noopener noreferrer" href="https://support.google.com/chrome/answer/2693767?co=GENIE.Platform%3DDesktop&hl=en" target="_blank">Chrome</a></li><li><a rel="noopener noreferrer" href="https://support.apple.com/en-au/guide/safari/ibrwe2159f50/mac" target="_blank">Safari</a></li><li><a rel="noopener noreferrer" href="https://support.mozilla.org/en-US/kb/how-manage-your-camera-and-microphone-permissions" target="_blank">Firefox</a></li><li><a rel="noopener noreferrer" href="https://support.microsoft.com/en-au/help/4468232/windows-10-camera-microphone-and-privacy" target="_blank">Edge</a></li></ul><p><strong>3. Wait for your practitioner to join the video call.</strong> </p><p><span style="font-size: 12pt;"><strong>The Telehealth Platform</strong></span></p><p>This telehealth platform is provided by your clinic via the Zanda Health Practice Management platform, which leverages software and technologies of third party providers such as Zoom. Telehealth calls are secure, private and <strong>not </strong>automatically recorded by the platform and software providers. Your practitioner may record the session with your permission for clinical or administrative purposes. All call data is fully encrypted, and Zoom does not have access to any of your personal information.</p><p><span style="font-size: 12pt;"><strong>Privacy and Terms of Service</strong></span></p><p>Your health practitioner may collect personal information about you (which may include sensitive information) for the purposes of providing you with health services or enabling the telehealth appointment. By using the telehealth service you agree to {BusinessName} Terms & Conditions, and to its collection and handling of your personal and sensitive information in accordance with its Privacy Policy.<br><br></p><p><span id="isPasted" style='color: rgb(65, 65, 65); font-family: "Noto Sans", sans-serif; font-size: 14px; font-style: normal; font-variant-ligatures: normal; font-variant-caps: normal; font-weight: 400; letter-spacing: 0.1px; orphans: 2; text-align: left; text-indent: 0px; text-transform: none; widows: 2; word-spacing: 0px; -webkit-text-stroke-width: 0px; white-space: normal; background-color: rgb(255, 255, 255); text-decoration-thickness: initial; text-decoration-style: initial; text-decoration-color: initial; display: inline !important; float: none;'>Warm regards,</span><br style="box-sizing: border-box; scrollbar-color: rgba(79, 76, 76, 0.2) rgba(170, 170, 170, 0.2); scrollbar-width: thin; color: rgb(65, 65, 65); font-family: "Noto Sans", sans-serif; font-size: 14px; font-style: normal; font-variant-ligatures: normal; font-variant-caps: normal; font-weight: 400; letter-spacing: 0.1px; orphans: 2; text-align: left; text-indent: 0px; text-transform: none; widows: 2; word-spacing: 0px; -webkit-text-stroke-width: 0px; white-space: normal; background-color: rgb(255, 255, 255); text-decoration-thickness: initial; text-decoration-style: initial; text-decoration-color: initial;"><span style='color: rgb(65, 65, 65); font-family: "Noto Sans", sans-serif; font-size: 14px; font-style: normal; font-variant-ligatures: normal; font-variant-caps: normal; font-weight: 400; letter-spacing: 0.1px; orphans: 2; text-align: left; text-indent: 0px; text-transform: none; widows: 2; word-spacing: 0px; -webkit-text-stroke-width: 0px; white-space: normal; background-color: rgb(255, 255, 255); text-decoration-thickness: initial; text-decoration-style: initial; text-decoration-color: initial; display: inline !important; float: none;'>The {BusinessName} Team</span><br style="box-sizing: border-box; scrollbar-color: rgba(79, 76, 76, 0.2) rgba(170, 170, 170, 0.2); scrollbar-width: thin; color: rgb(65, 65, 65); font-family: "Noto Sans", sans-serif; font-size: 14px; font-style: normal; font-variant-ligatures: normal; font-variant-caps: normal; font-weight: 400; letter-spacing: 0.1px; orphans: 2; text-align: left; text-indent: 0px; text-transform: none; widows: 2; word-spacing: 0px; -webkit-text-stroke-width: 0px; white-space: normal; background-color: rgb(255, 255, 255); text-decoration-thickness: initial; text-decoration-style: initial; text-decoration-color: initial;"><span style='color: rgb(65, 65, 65); font-family: "Noto Sans", sans-serif; font-size: 14px; font-style: normal; font-variant-ligatures: normal; font-variant-caps: normal; font-weight: 400; letter-spacing: 0.1px; orphans: 2; text-align: left; text-indent: 0px; text-transform: none; widows: 2; word-spacing: 0px; -webkit-text-stroke-width: 0px; white-space: normal; background-color: rgb(255, 255, 255); text-decoration-thickness: initial; text-decoration-style: initial; text-decoration-color: initial; display: inline !important; float: none;'>{BusinessPhone} | [Email] | [Website]</span></p><p><br></p>
Post-Appointment Email Template – General Follow-Up
Name: Appointment Follow-Up – General Care Check-In
Description (for Zanda users) To send post-appointment emails to clients. Use it with the post-appointment automations in User Menu > Account Settings > Communication > Automations.
Subject Line: How Did Your Appointment Go?
Body:
Hi {ClientPreferredName},
We hope you’re feeling well after your recent appointment with {AppointmentPractitionerFullName} at {BusinessName}.
If you have any follow-up questions, need further support, or would like to book another session, we’re here to help. Call us on {BusinessPhone}
You can also book your next appointment online via our Client Portal: {ClientPortal}
Your wellbeing is our top priority—we’d love to continue supporting you.
Warm regards,
The {BusinessName} Team
{BusinessPhone} | [Email] | [Website]
HTML code you can copy:
<p id="isPasted" dir="ltr">Hi {ClientPreferredName},<br><br></p><p dir="ltr">We hope you’re feeling well after your recent appointment with {AppointmentPractitionerFullName} at {BusinessName}.<br><br></p><p dir="ltr">If you have any follow-up questions, need further support, or would like to book another session, we’re here to help. Call us on {BusinessPhone}</p><p dir="ltr">You can book your next appointment online via our Client Portal: {ClientPortal}<br><br></p><p dir="ltr">Looking after your wellbeing is our top priority—we’d love to continue supporting you.<br><br></p><p>Warm regards,<br>The {BusinessName} Team<br>{BusinessPhone} | [Email] | [Website]</p>
Post-Appointment Email Template – Patient Satisfaction Survey
Name: Post-Appointment Feedback Request
Description (for Zanda users) To send post-appointment emails to clients. Use it with the post-appointment automations in User Menu > Account Settings > Communication > Automations.
Subject Line: Help Us Improve – Share Your Feedback
Body:
Hi {ClientPreferredName},
Thank you for visiting {BusinessName} for your recent {AppointmentServiceName} session with {AppointmentPractitionerFullName}. We’re committed to delivering the best possible care, and your feedback helps us grow and improve.
Please take a moment to complete our brief satisfaction survey: (Insert survey form link)
Your time and insights are greatly appreciated.
Sincerely,
The {BusinessName} Team
{BusinessPhone} | [Email] | [Website]
HTML code you can copy:
<p id="isPasted" dir="ltr">Hi {ClientPreferredName},<br><br></p><p dir="ltr">Thank you for visiting {BusinessName} for your recent {AppointmentServiceName} session with {AppointmentPractitionerFullName}. We’re committed to delivering the best possible care, and your feedback helps us grow and improve.<br><br></p><p dir="ltr">Please take a moment to complete our brief satisfaction survey: (Insert survey form link)<br><br></p><p dir="ltr">Your time and insights are greatly appreciated.<br><br></p><p>Sincerely,<br>The {BusinessName} Team<br>{BusinessPhone} | [Email] | [Website]</p>
Post-Appointment SMS Template – General Check-In
Description (for Zanda users) To send post-appointment SMS messages to clients. Use it with the post-appointment automations in User Menu > Account Settings > Communication > Automations.
Hi {ClientPreferredName}, we hope you’re doing well after your recent appointment. Reply to this message to let us know if you’d like to book a follow-up or if you have any questions.
Recall Automation Email Template
Description (for Zanda users) To send a recall email to clients. Use it with the recall automations in User Menu > Account Settings > Communication > Automations.
Name: 3-Month Recall Follow-Up
Subject Line: We're checking in on how you've been
Body:
Hi {ClientPreferredName},
We hope you’ve been doing well since your last visit with us at {BusinessName}.
As part of your ongoing care, we recommend scheduling a follow-up appointment. Regular check-ins help us support your progress and address any concerns early.
If you're ready to book, please give us a call or book an appointment through our Client Portal: {ClientPortal}
If you need help finding a time or have any questions, feel free to get in touch—we're here to help.
We look forward to seeing you again soon.
Warm regards,
The {BusinessName} Team
{BusinessPhone} | [Email] | [Website]
HTML code you can copy:
<p dir="ltr" id="isPasted">Hi {ClientPreferredName}<br><br></p><p dir="ltr">We hope you’ve been doing well since your last visit with us at {BusinessName}.<br><br></p><p dir="ltr">As part of your ongoing care, we recommend scheduling a follow-up appointment. Regular check-ins help us support your progress and address any concerns early.</p><p dir="ltr">If you're ready to book, please give us a call or book an appointment through our Client Portal: {ClientPortal}<br><br>If you need help finding a time or have any questions, feel free to get in touch—we're here to help.</p><p dir="ltr">We look forward to seeing you again soon.<br><br></p><p>Warm regards,<br>The {BusinessName} Team<br>{BusinessPhone} | [Email] | [Website]</p>
Recall SMS Template
Description (for Zanda users) To send a recall SMS messages to clients. Use it with the recall automations in User Menu > Account Settings > Communication > Automations.
Hi {ClientPreferredName}, it's been a while since your last visit to {BusinessName}. Ready to book your next appointment? Book online here {ClientPortal} or reply to this message
Unpaid Invoices Automation Email
Name: Automation Unpaid Invoice Email
Description (for Zanda users) To send post-appointment emails to clients. Use it with the post-appointment automations in User Menu > Account Settings > Communication > Automations.
Subject Line: Your invoice from {BusinessName}
Body:
Hi {RecipientPreferredName} ,
Please click on the link to view and pay your invoice: {InvoicePDFLink}. If you have any questions please call us or reply to this email.
Sincerely,
The {BusinessName} Team
{BusinessPhone} | [Email] | [Website]
HTML code you can copy:
<p id="isPasted">Hi {RecipientPreferredName},</p><p><br style="box-sizing: border-box; scrollbar-color: rgba(79, 76, 76, 0.2) rgba(170, 170, 170, 0.2); scrollbar-width: thin;"></p><p>Please click on the link to view and pay your invoice: {InvoicePDFLink}. If you have any questions please call us or reply to this email.</p><p><br style="box-sizing: border-box; scrollbar-color: rgba(79, 76, 76, 0.2) rgba(170, 170, 170, 0.2); scrollbar-width: thin;"></p><p id="isPasted" dir="ltr">Sincerely,<br>The {BusinessName} Team<br>{BusinessPhone} | [Email] | [Website]</p>
Paid Invoices Automation Email
Name: Automations: Paid Invoice/Receipt Email
Description (for Zanda users): To send payment confirmation/receipt emails to clients. Use it with the paid invoices automations in User Menu > Account Settings > Communication > Automations.
Subject Line: Your receipt from {BusinessName}
Body:
Hi {RecipientPreferredName},
Thank you for your payment. Please click the link to view and download your receipt: {InvoicePDFLink}.
If you have any questions about this invoice, feel free to call us or reply to this email.
Sincerely,
The {BusinessName} Team
{BusinessPhone} | [Email] | [Website]
HTML code you can copy:
<p>Hi {RecipientPreferredName},<br><br>Thank you for your payment. Please click the link to view and download your receipt: {InvoicePDFLink}. </p><p>If you have any questions about this invoice, feel free to call us or reply to this email.</p><p>Sincerely,<br>The {BusinessName} Team<br>{BusinessPhone} | [Email] | [Website]</p>
Paid Invoices Automation SMS
Name: Automations: Paid Invoice/Receipt Link SMS
Description (for Zanda users): Short confirmation message to send receipts via SMS for paid invoices.
Body: Thanks for your payment, {RecipientPreferredName}. Receipt: {InvoicePDFLink} {BusinessName}
Monthly Superbill Automated Email Template
Subject Line: Your Monthly Superbill
Description (for Zanda users) To send monthly superbills. Use it with the superbills automation in User Menu > Account Settings > Billing > Invoices.
Body:
"Dear {ClientPreferredName}
We hope this message finds you well!
Attached to this email, you will find your Superbill {SuperbillPDFLink} for the services provided at {BusinessName} in the previous month. This document contains all the necessary information you need for insurance reimbursement.
Here’s what to do next:
- Review Your Superbill: Ensure that all the details are accurate, including the services listed and personal information.
- Submit to Your Insurance Provider: Send this Superbill to your insurance company for reimbursement. You can usually submit it through their online portal, by mail, or by fax.
- Keep a Copy for Your Records: It's a good idea to save a copy of the Superbill for your personal records.
If you have any questions about the Superbill or need further assistance, please don't hesitate to contact us on {BusinessPhone}.
Warm regards,
The {BusinessName} Team
{BusinessPhone} | [Email] | [Website]
HTML code you can copy:
<p id="isPasted">Dear {RecipientPreferredName}</p><p><br></p><p>We hope this message finds you well!</p><p><br></p><p>Attached to this email, you will find your Superbill {SuperbillPDFLink} for the services provided at {BusinessName} in the previous month. This document contains all the necessary information you need for insurance reimbursement.</p><p><br></p><p>Here’s what to do next:</p><p><br></p><ol><li>Review Your Superbill: Ensure that all the details are accurate, including the services listed and personal information.</li><li>Submit to Your Insurance Provider: Send this Superbill to your insurance company for reimbursement. You can usually submit it through their online portal, by mail, or by fax.</li><li>Keep a Copy for Your Records: It's a good idea to save a copy of the Superbill for your personal records.<br><br></li></ol><p>If you have any questions about the superbill or need further assistance, please don't hesitate to contact us on {BusinessPhone}. </p><p><br></p><p>Warm regards,</p><p>{BusinessName}</p><p>[enter your contact details]</p>
Monthly Statement Automated Email Template
Subject Line: Your Monthly Statement
Description (for Zanda users) To send monthly statements. Use it with the statements automation in User Menu > Account Settings > Billing > Invoices.
Body:
"Dear {ClientPreferredName}
We hope this message finds you well!
Attached to this email, you will find your monthly statement {StatementPDFLink} for the services provided at {BusinessName} in the previous month.
If you have any questions about the statement or need further assistance, please don't hesitate to contact us on {BusinessPhone}.
Warm regards,
The {BusinessName} Team
{BusinessPhone} | [Email] | [Website]
HTML code you can copy:
<p>Dear {RecipientPreferredName}</p><p><br></p><p>We hope this finds you well!<br style="box-sizing: border-box; scrollbar-color: rgba(79, 76, 76, 0.2) rgba(170, 170, 170, 0.2); scrollbar-width: thin;"><br style="box-sizing: border-box; scrollbar-color: rgba(79, 76, 76, 0.2) rgba(170, 170, 170, 0.2); scrollbar-width: thin;"></p><p>Attached to this email, you will find your monthly statement {StatementPDFLink} for the services provided at {BusinessName} in the previous month. </p><p>If you have any questions about the statement or need further assistance, please don't hesitate to contact us on {BusinessPhone}. <br style="box-sizing: border-box; scrollbar-color: rgba(79, 76, 76, 0.2) rgba(170, 170, 170, 0.2); scrollbar-width: thin;"><br style="box-sizing: border-box; scrollbar-color: rgba(79, 76, 76, 0.2) rgba(170, 170, 170, 0.2); scrollbar-width: thin;"></p><p>Warm regards,<br style="box-sizing: border-box; scrollbar-color: rgba(79, 76, 76, 0.2) rgba(170, 170, 170, 0.2); scrollbar-width: thin;">{BusinessName}</p>
Incomplete Forms Automated Email Templates
Email Template #1
Name: Automations: Incomplete Forms Reminder - Days Before Next Appointment
Description: Template to send incomplete forms reminder emails to clients. Use it with the incomplete forms automations in User Menu > Account Settings > Communication > Automations.
Email Subject: Action Required: Please Complete Your Form Before Your Upcoming Visit on {AppointmentDate:MMM d}
Content:
Hi {RecipientFirstName},
We are looking forward to seeing you for your appointment on {AppointmentDate:MMM d} at {AppointmentStartTime}.
We noticed you have an incomplete required form needed for your visit. Completing this form now helps us prepare for your consultation and ensures you maximize your time with your practitioner.
Please click the link below to complete your form: {IncompleteForm}
If you have already completed the form, please disregard this email. If you have any questions, please contact our office.
Thank you,
The Team at {BusinessName}
{BusinessPhone} | [Email] | [Website]
HTML code you can copy:
<p>Hi {RecipientFirstName},</p><p>We are looking forward to seeing you for your appointment on {AppointmentDate:MMM d} at {AppointmentStartTime}.</p><p>We noticed you have an incomplete required form needed for your visit. Completing this form now helps us prepare for your consultation and ensures you maximize your time with your practitioner.</p><p>Please click the link below to complete your form: {IncompleteForm}</p><p>If you have already completed the form, please disregard this email. If you have any questions, please contact our office.</p><p>Thank you, </p><p>The Team at {BusinessName}<br>{BusinessPhone} | [Email] | [Website]</p>
Email Template #2
Name: Automations: Incomplete Forms Reminder - Days Before Expiry
Description: Template to send incomplete forms reminder emails to clients. Use it with the incomplete forms automations in User Menu > Account Settings > Communication > Automations.
Email Subject: Final Reminder: Your Required Form is Expiring Soon
Content:
Hi {RecipientFirstName},
This is an important reminder that your required form is due to expire soon.
If this form expires, you may lose any progress you have saved and need to begin the process again.
Please complete your form immediately by clicking the link below: {IncompleteForm}
If you have already completed the form, please disregard this email. If you have any questions, please contact our office.
Thank you,
The Team at {BusinessName}
{BusinessPhone} | [Email] | [Website]
HTML code you can copy:
<p>Hi {RecipientFirstName},</p><p>This is an important reminder that your required form is due to expire soon.</p><p>If this form expires, you may lose any progress you have saved and need to begin the process again.</p><p>Please complete your form immediately by clicking the link below: {IncompleteForm}</p><p id="isPasted">If you have already completed the form, please disregard this email. If you have any questions, please contact our office.</p><p>Thank you, </p><p>The Team at {BusinessName}</p><p>{BusinessPhone} | [Email] | [Website]</p>
Email Template #3
Name: Automations: Incomplete Forms Reminder - Days After Form Created
Description: Template to send incomplete forms reminder emails to clients. Use it with the incomplete forms automations in User Menu > Account Settings > Communication > Automations.
Email Subject: Quick Reminder: Finish Your Incomplete Form
Content:
Hi {RecipientFirstName},
We noticed you recently started a required form but may have been interrupted before finishing it. We want to make sure your paperwork is complete and ready for your file.
Click the link below to return to the form and pick up exactly where you left off: {IncompleteForm}
If you are experiencing any difficulty accessing or completing the form, please reply to this email, and we will be happy to assist you.
Thank you,
The Team at {BusinessName}
{BusinessPhone} | [Email] | [Website]
HTML code you can copy:
<p>Hi {RecipientFirstName},</p><p>We noticed you recently started a required form but may have been interrupted before finishing it. We want to make sure your paperwork is complete and ready for your file.</p><p>Click the link below to return to the form and pick up exactly where you left off: {IncompleteForm}</p><p>If you are experiencing any difficulty accessing or completing the form, please reply to this email, and we will be happy to assist you.</p><p>Thank you, </p><p>The Team at {BusinessName}</p><p>{BusinessPhone} | [Email] | [Website]</p>
Incomplete Forms Automated SMS Templates
SMS Template #1
Name: Automation: Incomplete Forms Reminder - Days Before Next Appointment
Description: SMS template to send an incomplete form text reminder. Use it with the incomplete forms automations in User Menu > Account Settings > Communication > Automations.
Content:
Hi {RecipientFirstName}, your appointment with {AppointmentPractitionerFullName} is approaching. Please complete your required form ahead of your visit to save time: {IncompleteForm}. {BusinessName}
SMS Template #2
Name: Automation: Incomplete Forms Reminder - Days Before Expiry
Description: SMS template to send an incomplete form text reminder. Use it with the incomplete forms automations in User Menu > Account Settings > Communication > Automations.
Content:
Hi {RecipientFirstName}, your required form is due to expire soon. Please complete it now to avoid losing progress: {IncompleteForm}. {BusinessName}
SMS Template #3
Name: Automation: Incomplete Forms Reminder - Days After Form Created
Description: SMS template to send an incomplete form text reminder. Use it with the incomplete forms automations in User Menu > Account Settings > Communication > Automations.
Content:
Hi {RecipientFirstName}, you started a required form but haven't finished. Click here to easily pick up where you left off: {IncompleteForm}. {BusinessName}