Setting Up Available Services and Times on Client Portal
Configure your client portal to offer right mix of services and available times
Setting up the right mix of services and available times on your Client Portal helps clients book with confidence while ensuring your team’s schedule runs smoothly. In this guide, you’ll learn how to prepare your services, configure practitioner availability across different locations, and control exactly what appears in your Client Portal. With these settings in place, your clients will see accurate service options and real-time availability, making online bookings simple and reliable for everyone.
In this article:
Recommended Settings Checklist
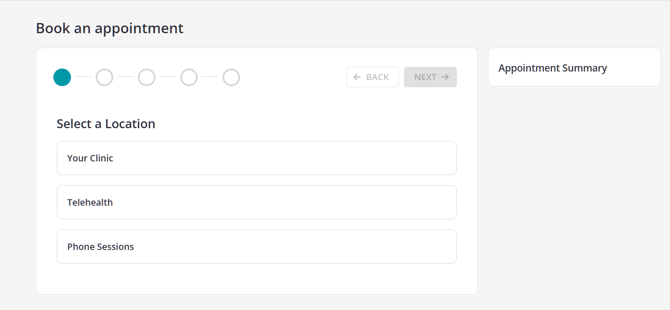
✅ If you offer services in multiple locations, set them up in Settings > Practice > Locations. See the detailed guide here. For example, you can have different locations for your face to face, telehealth and phone sessions, or different practice buildings. This is how multiple location availability will look on the client portal: 
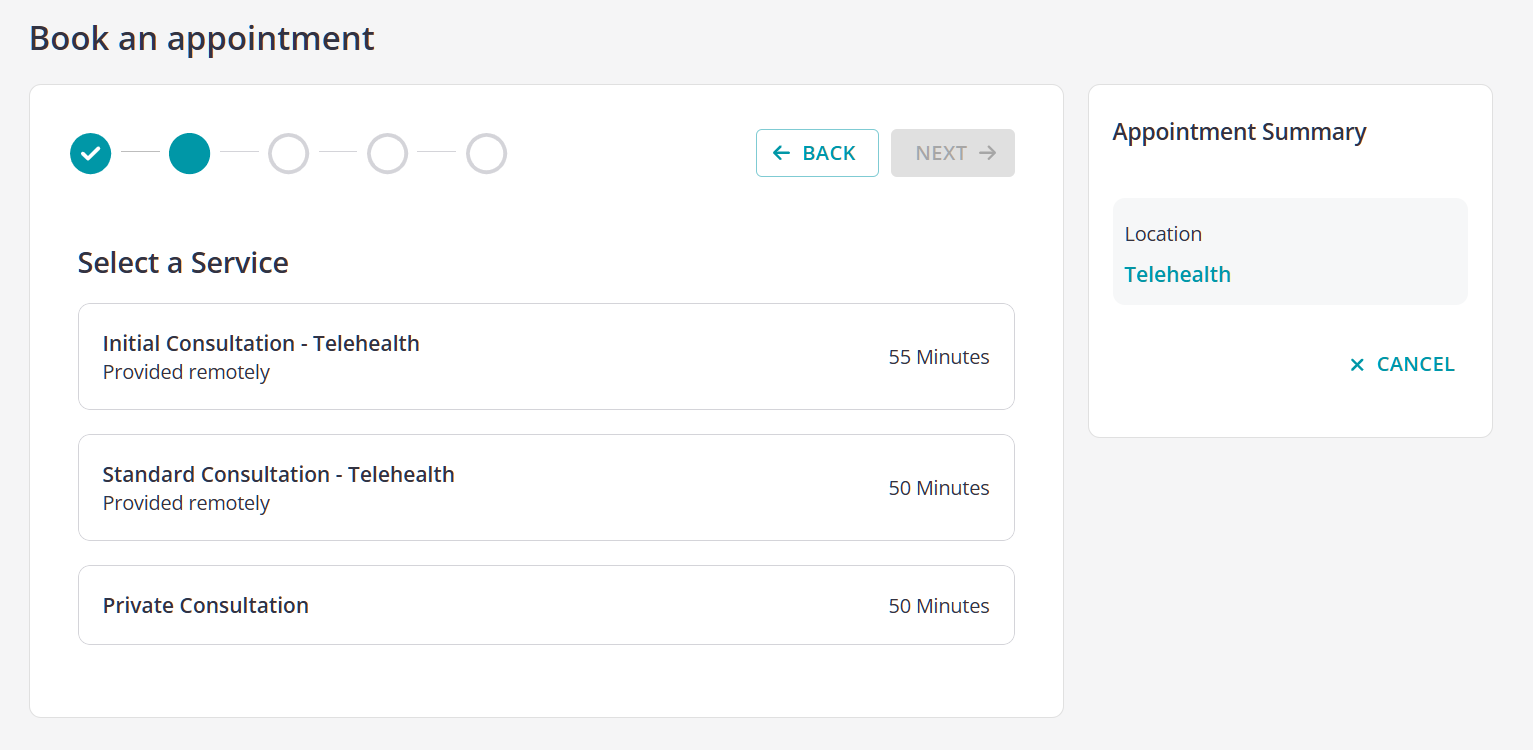
✅ Set up service templates for each service you'll be offering for online bookings. This is done in Settings > Billing > Services. See the detailed guide here. Here's an example of a list of services provided for online bookings on a client portal:

Service template fields relevant to client portal behavior:
-
- Name, Duration, Price, (Tax if applicable)– displayed to clients when booking.
- Category (optional) – helps clients filter services.
- Location – limits the service to selected locations
- Portal Deposit – optional upfront payment for online bookings, available when a Stripe account is integrated with your Zanda account. You have the option to pass on Stripe transaction fees to clients by transparently adding these charges to their invoices, helping your practice manage card processing costs more effectively.
- Active – determines whether the service appears at all in your Zanda account selections.
✅ Set up your practitioner(s)' availability in each location. See the detailed guide here.
This is an example of how a practitioner's availability will appear on a client portal: 
Managing Services Available On Client Portal
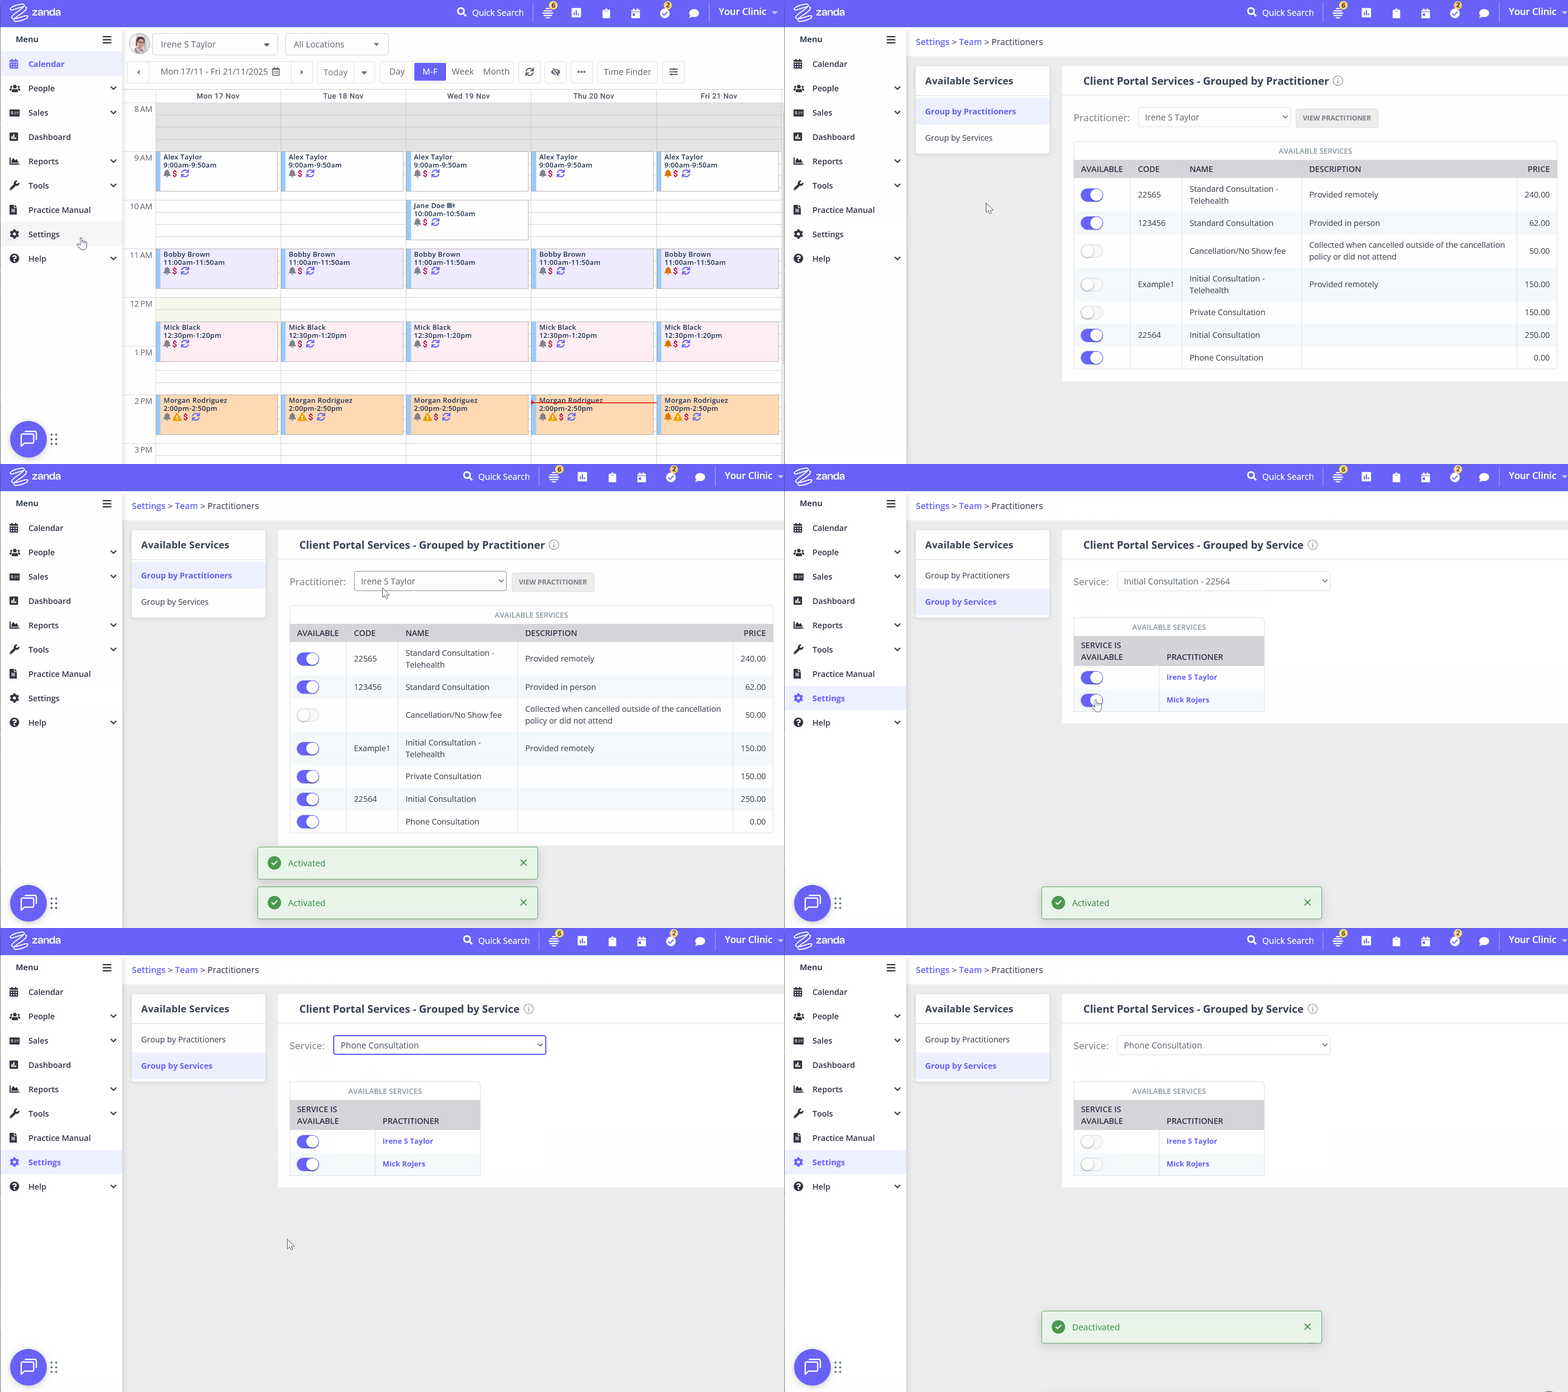
Once your service templates are ready, you can choose which ones to display in your client portal and assign them to specific practitioners as needed.
- Go to Settings > Schedule > Client Portal.
- Navigate to Available Services.
Here, you will see two options:
- Group by Practitioner: On this page, you can specify which services each practitioner is available to offer by toggling the services relevant to them.
- Group by Services: On this page, you can select a service and assign which practitioners are available for bookings under that service.

Once you’ve assigned services to practitioners and enabled them for online bookings, Zanda will automatically update your client portal with these preferences. This ensures clients can easily book the appropriate services with the right clinicians.
Nominating Available Times
The times that show up as available for a practitioner in the Client Portal are determined by that practitioner's availability.
When you are on the Settings > Schedule > Client Portal > Access and Settings page, you can scroll down to the bottom of the page to the 'Set your available times and services' section and click the 'Settings > Team > Availability' link provided. 
You can also add and manage availability by going to Settings > Team > Availability directly any time.
- Practitioners must have availability set for the correct location and time blocks where “Clients can book online” is enabled.

- There are some other ways to limit practitioners' availability on the client portal for one-off cases, such as public holidays, annual or sick leave, etc. See our detailed guide about managing availability tips and tricks here.
💡 Important Note: Make sure you have set your time zone correctly in your Zanda account. By doing so, the availability times you have set in the availability will display exactly the same way to your clients in the Client Portal. If your clients live in a different time zone, the Client Portal will display the availability times to those clients according to their device time settings.
✅To set the account time zone, go to Settings > Practice > Business Info.
✅ To set the client's time zone, go to Client Profile > Details