Enabling Telehealth Calls on Appointments Automatically
You can streamline your administrative tasks by automatically enabling Zoom Telehealth Calls on appointments scheduled for telehealth sessions.

In this article:
- Set locations for telehealth appointments
- Set practitioner availability for telehealth appointments
- Telehealth Link important notes
First, you will set a special location type for your telehealth appointments:
- Navigate to Settings > Practice > Locations and create a new location for telehealth appointments, or open your existing location to edit.
- In the Location Type field, select 'Telehealth Video Call' type.

- Enter other location details if necessary and save the changes.
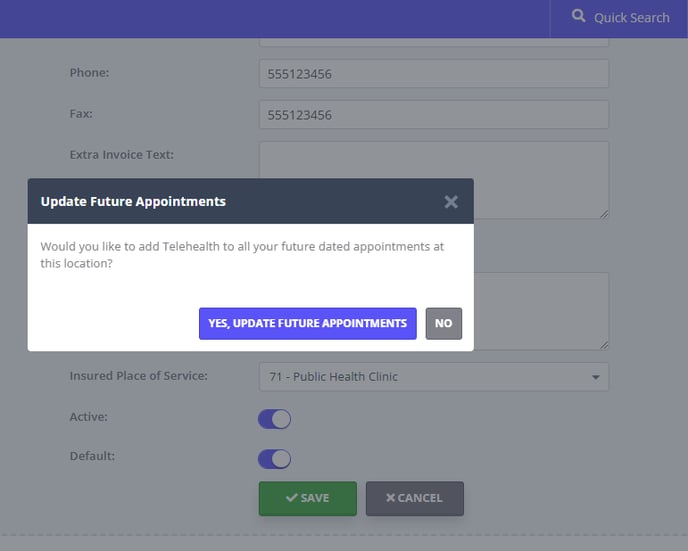
- When you hit 'Save' you will see a pop-up, asking 'Would you like to add Telehealth to all your future dated appointments at this location?'. Click 'Yes, Update Future Appointments' or 'No', depending on your preference.
- If you click 'Yes, Update Future Appointments', the Telehealth link will be enabled on all appointments with future dates in this location.
- If you click "No', the Telehealth link will stay disabled in all future dated appointments in this location.

💡 User Pro Tip
We introduced the ability to bulk-enable Telehealth call links on all future-dated appointments in a Telehealth Video Call location on February 21, 2025.
If you set up a Telehealth Video Call location before February 21, 2025, and have future appointments in that location with inactive Telehealth call links, you can enable them in bulk using these steps:
- Go to: Settings > Practice > Locations.
- Find the location where the future appointments need updating.
- Click the location name to open it for editing.
- Change the Location Type to any other type and click Save.
- On the confirmation pop-up, select either option.
- Change the Location Type back to 'Telehealth Video Call' and click Save.
- On the confirmation pop-up, click "Yes, Update Future Appointments" to enable the Telehealth link on all future appointments in this location.
This ensures all future appointments at that location have Telehealth links enabled, even if they were originally created before the feature was introduced.
Next, ensure that each practitioner who provides telehealth appointments has separate availability set up for their telehealth location.
- Navigate to Settings > Team > Availability and click the practitioner name to open their list of availabilities.
- Create a new availability for their telehealth location, or open the existing one to edit.
- In the Location dropdown, select the Telehealth location.
- Set the available days and hours, including the client portal online availability, if needed, and save the changes.

Telehealth Link Important Notes
Once the Telehealth Video Call location and the practitioners availability for this location are properly configured, all new appointments created by users within the app and by clients through the client portal will automatically include the Telehealth link.
- A single client Telehealth call link is now available for all client individual appointments and group appointments. You can copy this link from an appointment panel, or from a client profile > Appointments > Telehealth.
- The single client Telehealth call link is the same for any type of the Zoom Telehealth subscription enabled for this appointment: Basic, Pro or BYO .
- The {ClientTelehealthUrl} merge field, included in communication templates will send out the single client link for all single client and group appointments.
- If clients have back to back appointments they will see both the ongoing and upcoming appointment on the joining screen if the upcoming appointment starts within 30mins. They will choose which appointment they need to join and click its Join Telehealth Call link.
- If an appointment was initially set up in a different location type and later moved to a telehealth location, the telehealth link will be activated automatically.
- To send the Telehealth links to clients, prepare communication templates. This is done in Tools > Communication > Templates. Use the {ClientTelehealthUrl} merge field to automatically merge the client telehealth video call links in communication messages.
- If you opened your client portal to clients, they can access their appointments by clicking My Appointments list. Future appointments with active telehealth calls with have telehealth links available on them. Client will be able to join their telehealth sessions by clicking on those links on appointments on their client portal.